

Settings
Settings is where you personalize Raycast to fit your workflow. From appearance and hotkeys to AI configuration and extension management, everything is accessible from a single, streamlined interface. In v2, Settings has been redesigned with a cleaner layout that matches the refreshed look and feel of the app.
Open Settings quickly by pressing ⌘, / Ctrl, while Raycast is open, or search for "Settings" in Root Search.
Opening Settings
There are several ways to access Settings:
- Type Settings in Root Search.
- Press ⌘, / Ctrl, when Raycast is open.
- Select any command in Root Search, open the Action Panel (⌘K / CtrlK), and choose Configure Command or Configure Extension.
- Press ⇧⌘, / CtrlShift, from Root Search to jump directly to the selected item's settings.
Search Settings
You don't need to remember where every option lives. Press ⌘F / CtrlF while Settings is open and search for anything: a setting, a command, an extension, or just a keyword you remember. Select a result to jump straight to the right place.
Account
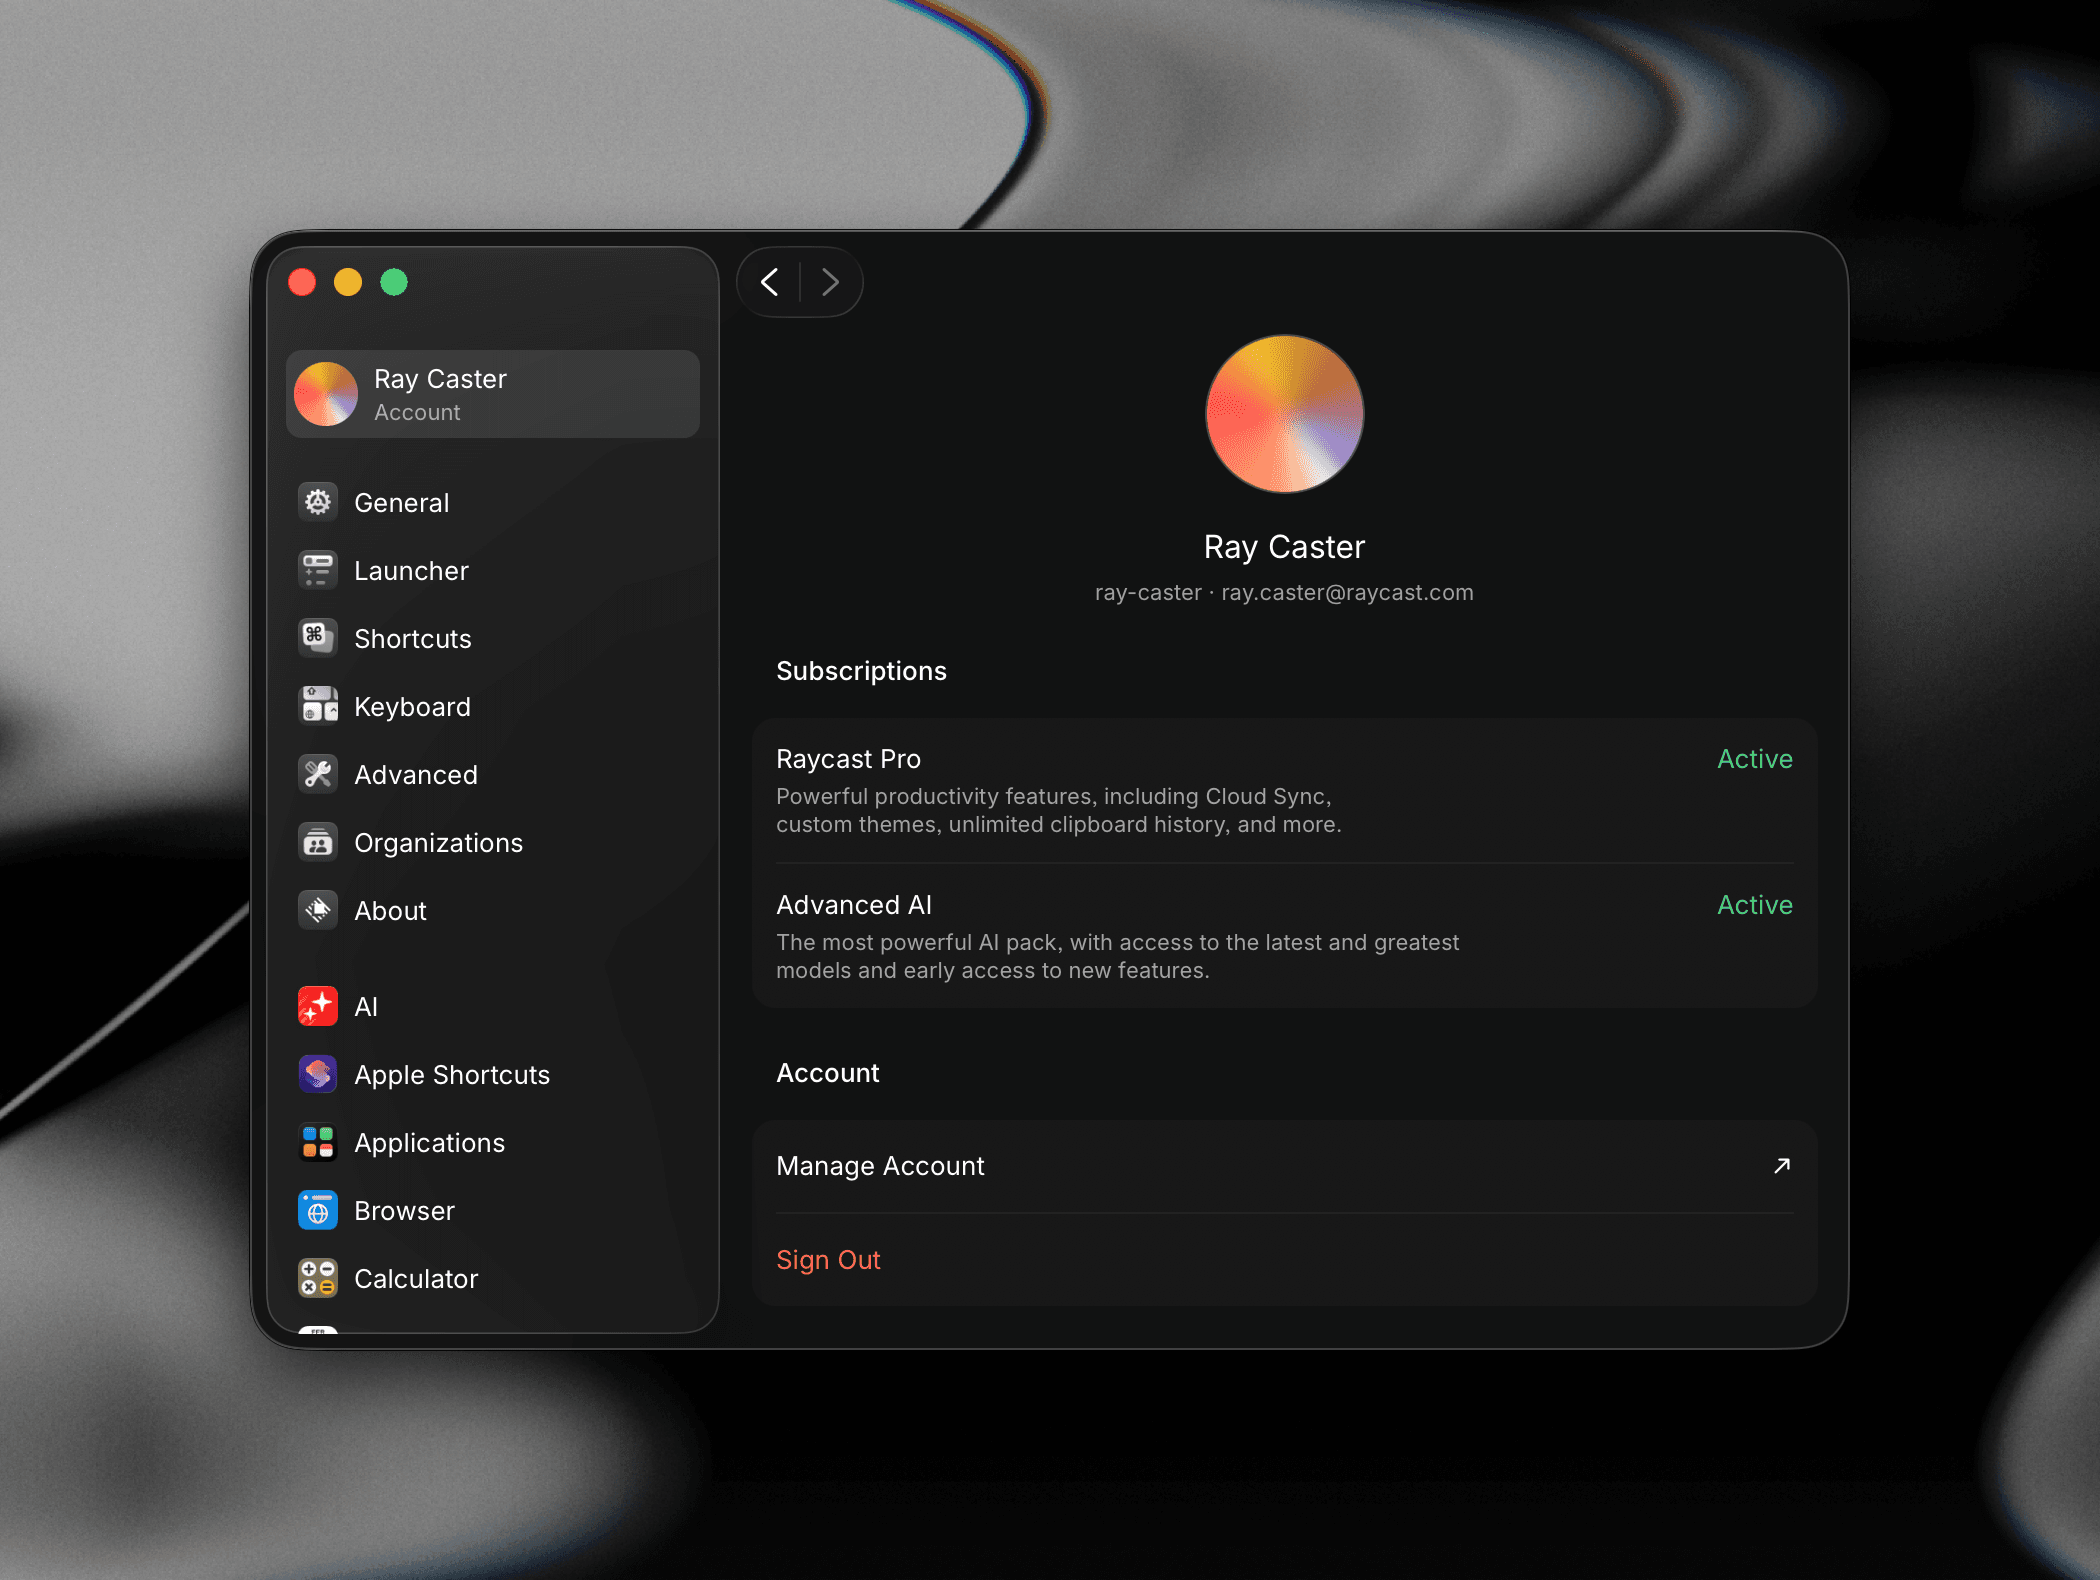
The Account tab sits at the top left of Settings and shows your profile at a glance. Simply click on your display name to manage your Raycast account, view your current plan (Free, Pro, or Teams), and access subscription settings. You can also sign in or sign out of your account, and switch between organizations if you belong to more than one.
General
The General tab contains the core options that shape your everyday Raycast experience.
Open at Login
Choose whether Raycast launches automatically at login. We recommend keeping this enabled so Raycast is always ready when you need it.
Show in Menu Bar
Toggle whether Raycast appears in the menu bar. When enabled, you can quickly access Settings, check for updates, and quit the app from the menu bar icon.
On macOS 26 (Tahoe), this toggle isn't enough on its own. Raycast also has to be allowed in System Settings → Menu Bar → Allow in the Menu Bar — until it is, macOS keeps the icon hidden even though the setting here is on.
Raycast Hotkey
Set the global keyboard shortcut that opens Raycast from anywhere on your computer. The default depends on your platform.
The default is ⌥Space. You can also replace Spotlight by assigning ⌘Space to Raycast, so you only need to remember one hotkey.
The default is the Windows key (), so pressing it opens Raycast instead of the Start Menu. This is the default on a fresh installation only.
Replace Spotlight
You can open Raycast with a global hotkey that overlays your current application, so you stay focused without switching windows. The default hotkey is ⌥Space.
We recommend replacing Apple's Spotlight (or any other application launcher) with Raycast — that way you only need to remember one hotkey. To do this, assign ⌘Space to Raycast:
- Open Settings (⌘,).
- Go to the General tab.
- Click the Raycast Hotkey field and press ⌘Space.
If ⌘Space doesn't register, another macOS feature is already using it. Free it up using the steps below.
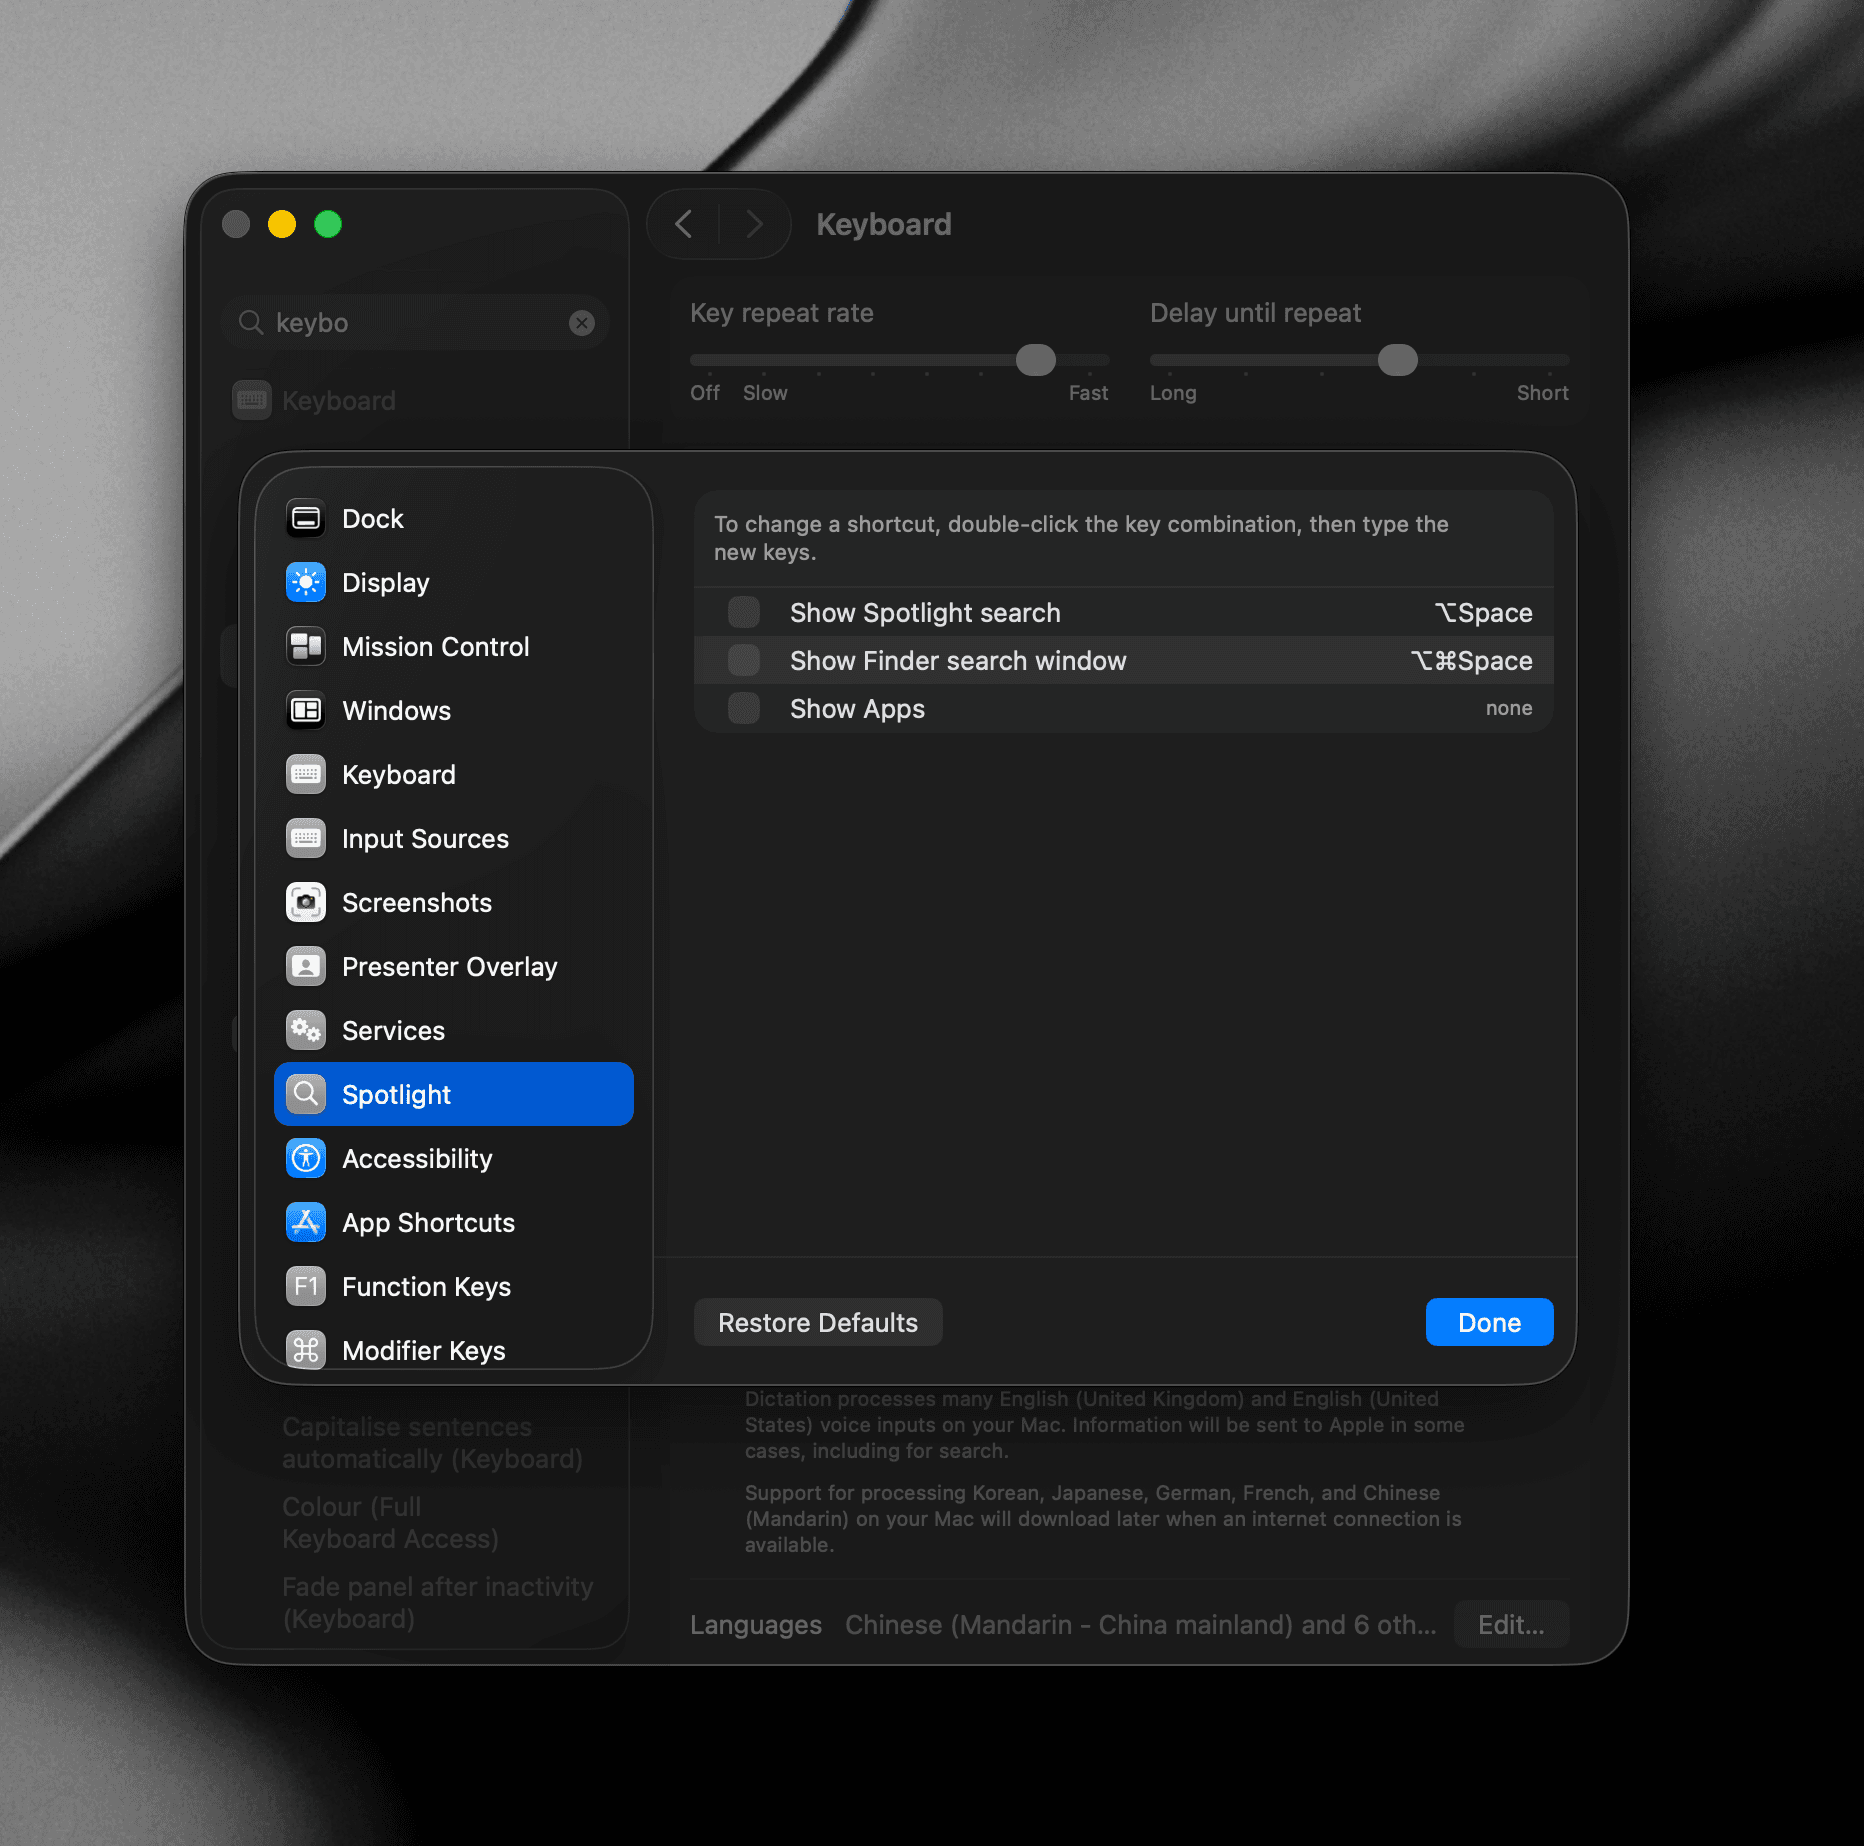
Disable the hotkey for Spotlight
If ⌘Space doesn't work, that hotkey is most likely still assigned to Spotlight search. Go to System Settings → Keyboard → Keyboard Shortcuts → Spotlight and uncheck (or change) Show Spotlight search.
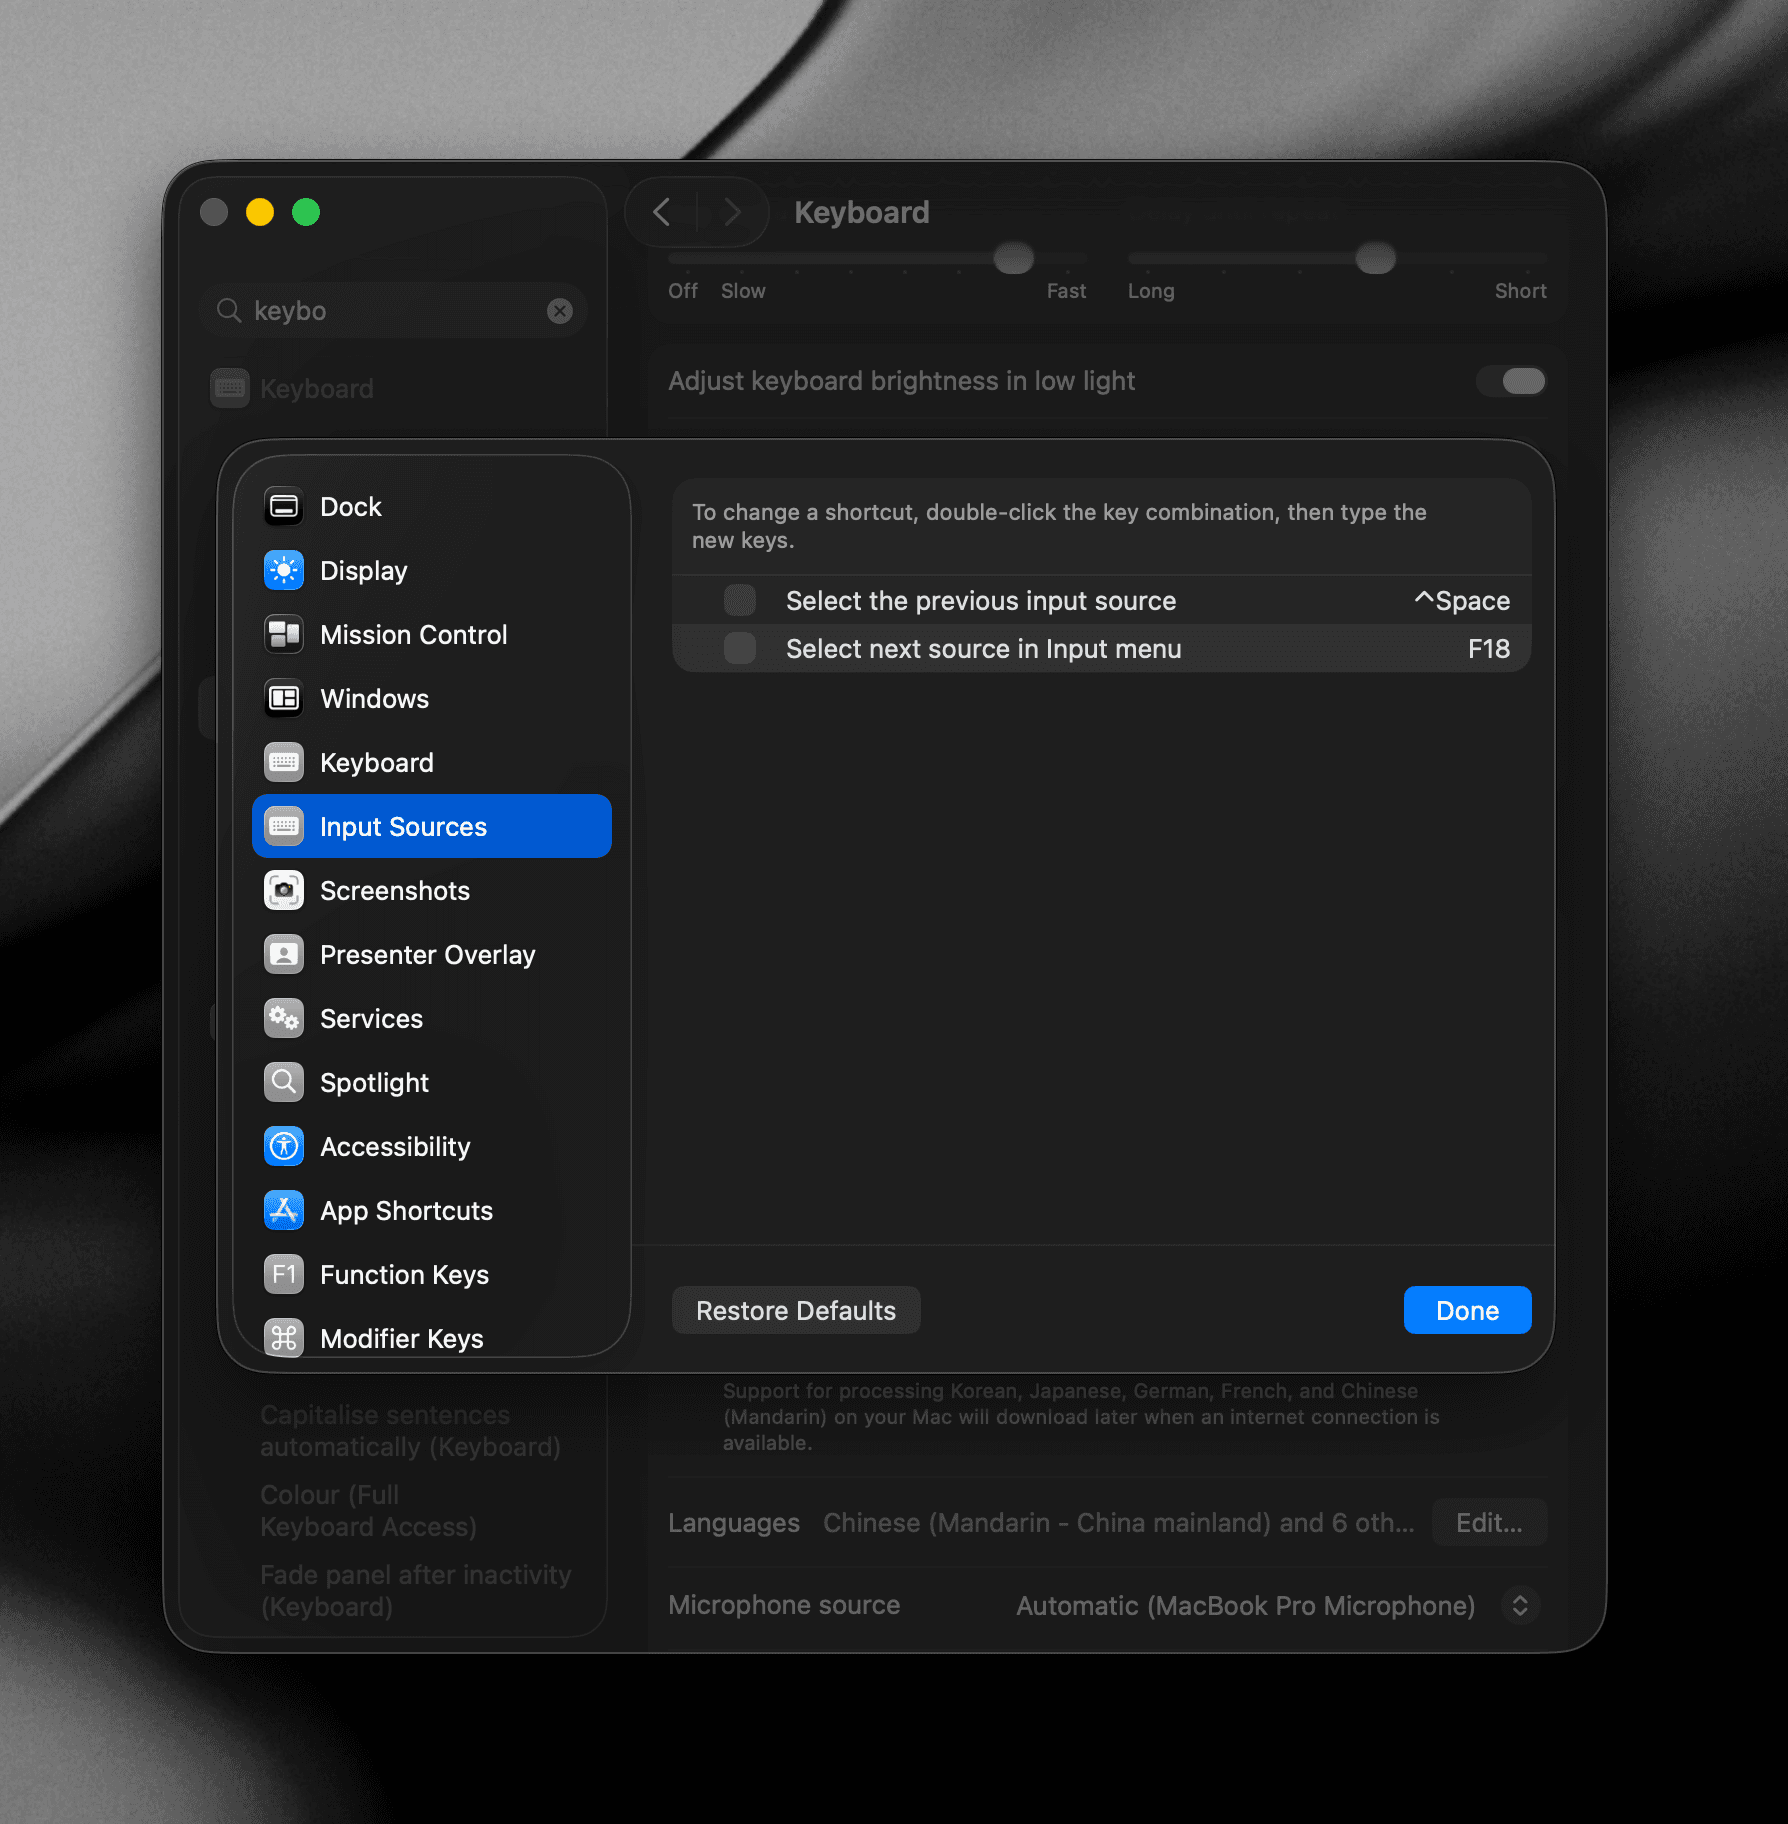
Disable the hotkey for language switching
If you use, or have previously used, multiple languages on your Mac, you'll likely have a conflicting shortcut. Go to System Settings → Keyboard → Keyboard Shortcuts → Input Sources and disable or change the shortcut.
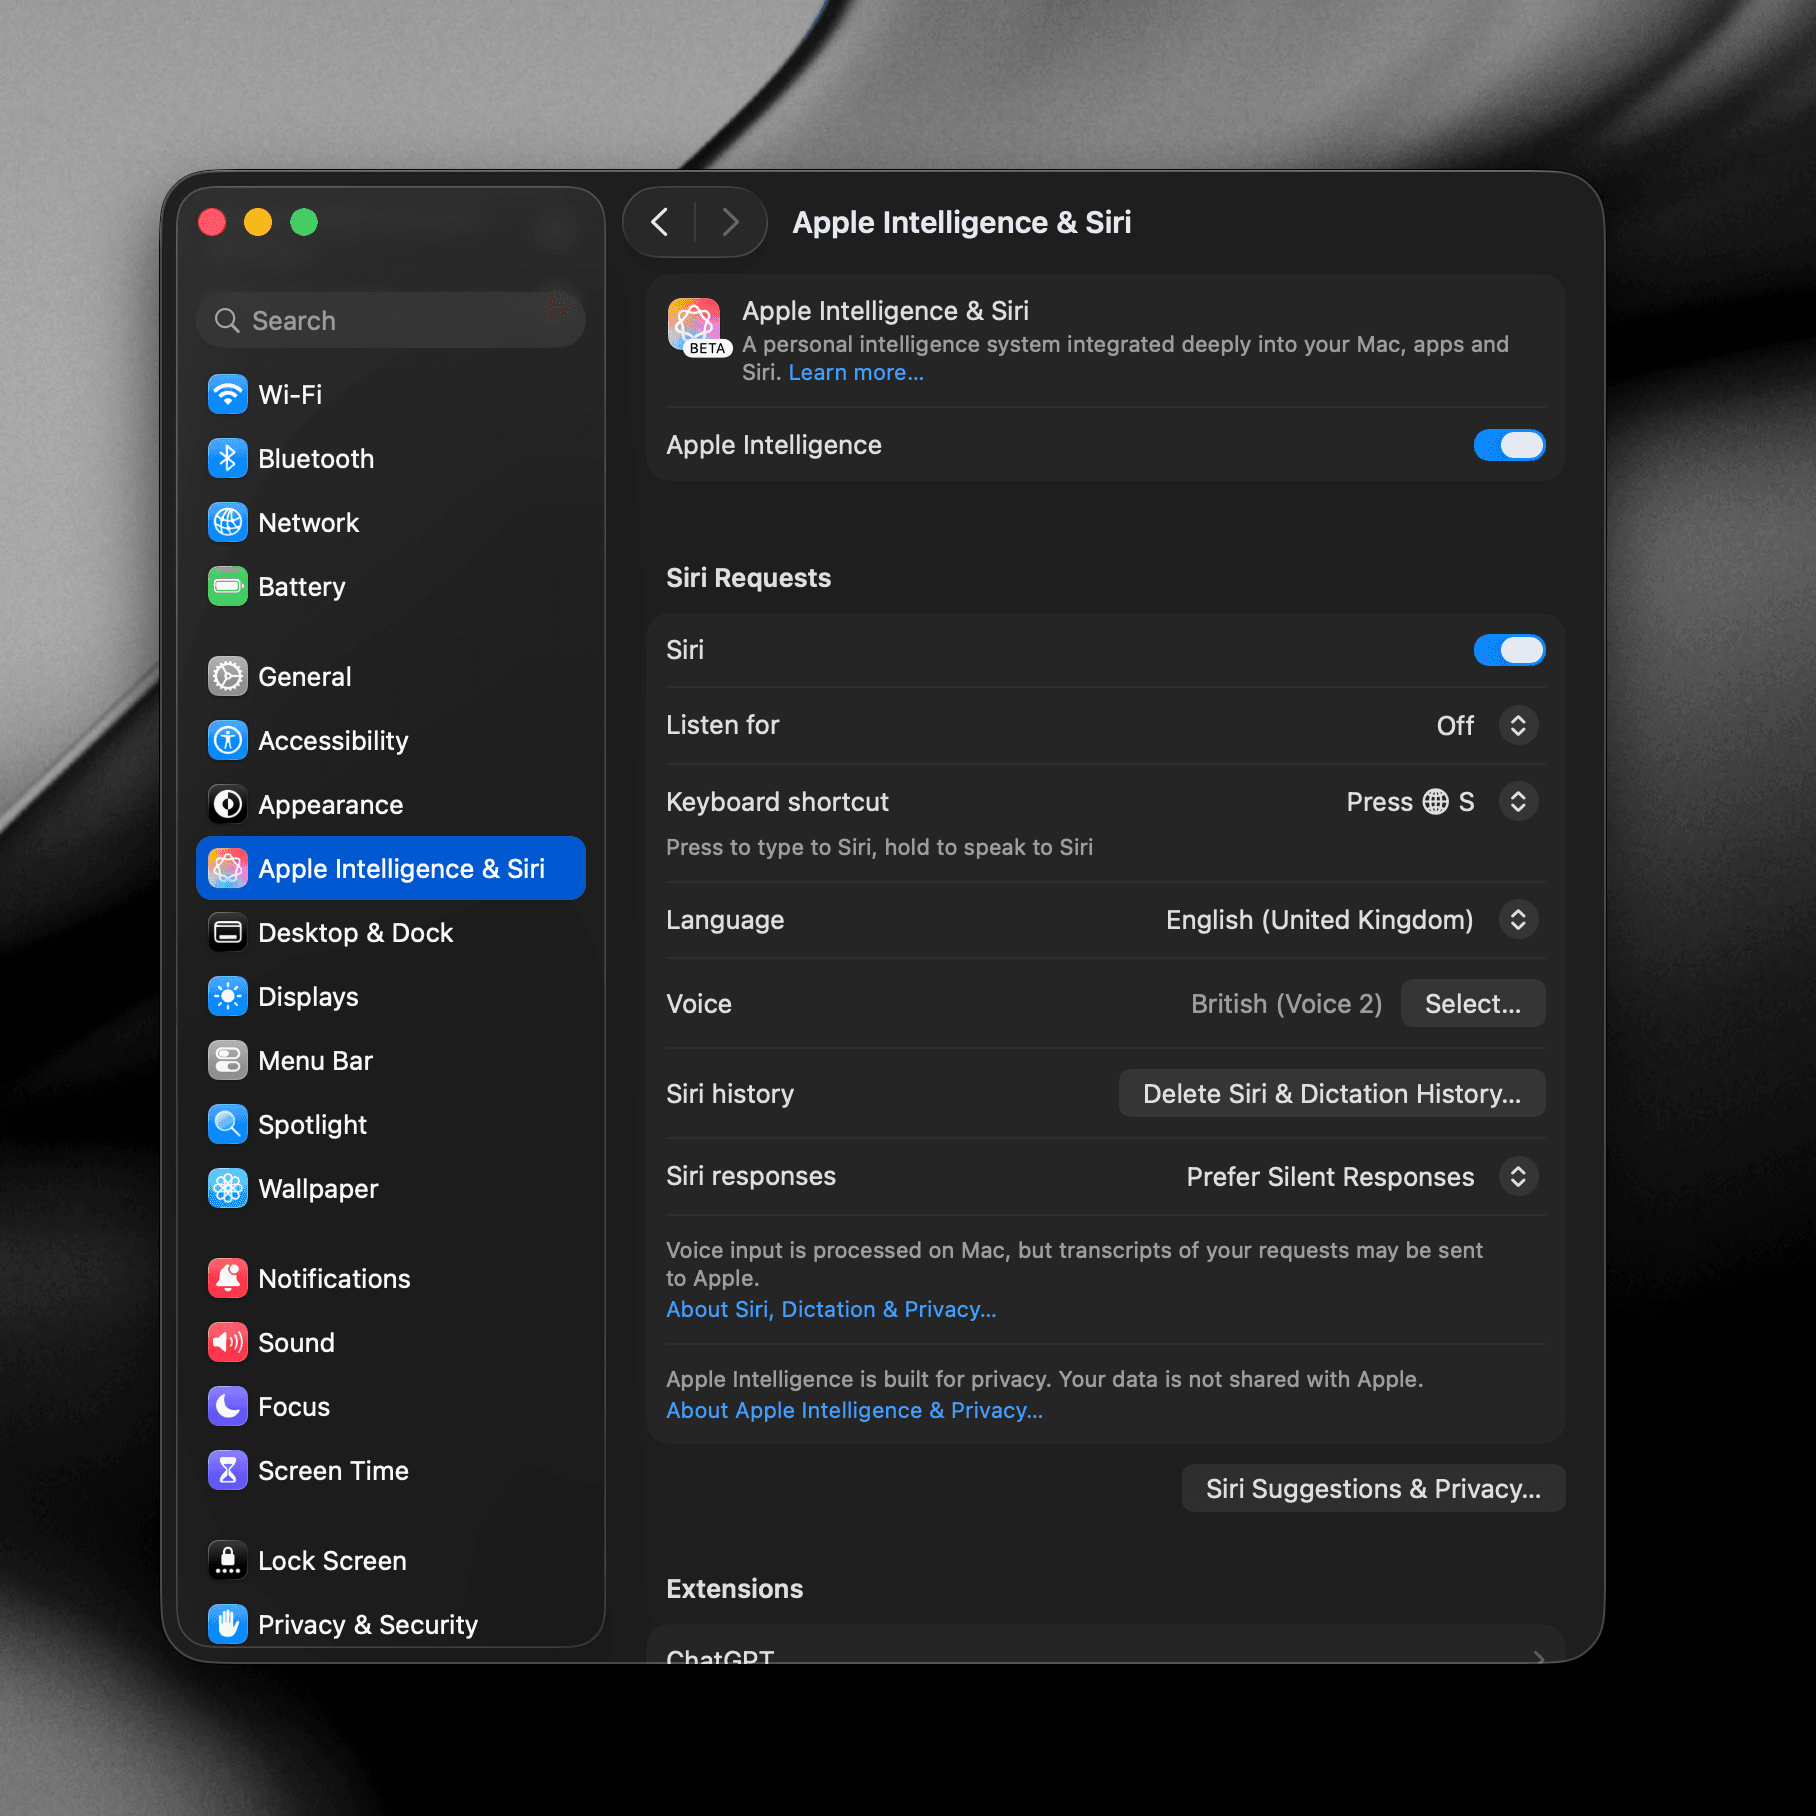
Ensure "Ask Siri" isn't using the same shortcut
By default, Siri may be set to "hold ⌘Space" or "hold ⌥Space". When Raycast shares that shortcut, you might notice a slight delay when toggling the main window. We recommend changing the Siri shortcut to something else, or disabling it if you don't use it. Go to System Settings → Apple Intelligence & Siri and change or turn off the keyboard shortcut.
Use the Windows Key
If your Raycast Hotkey is something else — because you changed it, or because you set Raycast up before the Windows key became the default — click Replace Start Menu next to the Raycast Hotkey field in Settings → General to switch to the Windows key.
Appearance
Control the visual presentation of Raycast.
Follow System Appearance
Raycast adopts your system's light or dark mode by default. Toggle this off to manually choose a theme. Raycast ships with a curated set of built-in themes, and you can browse and install community themes from the Store.
Interface Size
Interface Size lets you make Raycast bigger or smaller so it's easier to read and comfortable on your display. Choose one of three sizes using the Aa buttons:
- Default — the standard size.
- Large — a bit bigger.
- Larger — the biggest option.
When you change the size, Raycast's windows resize to match, and all UI elements scale with them, including text, buttons, and fields.
Interface Size can also nudge the content zoom in windows that have their own zoom, such as AI Chat and Raycast Notes: if a window's content zoom is smaller than the new interface size, it grows to match so things stay readable. Content zoom stays independent, though. You can still adjust it per window and set your own values regardless of the interface size.
Window Mode
Choose between Compact and Expanded mode. Compact mode uses a more condensed layout so you can see more results at a glance.
Turn on Show Favorites in Compact Mode to show your favorites as icons in the compact window.
Launcher
The top of the Launcher tab is where you fine-tune the everyday launcher behavior.
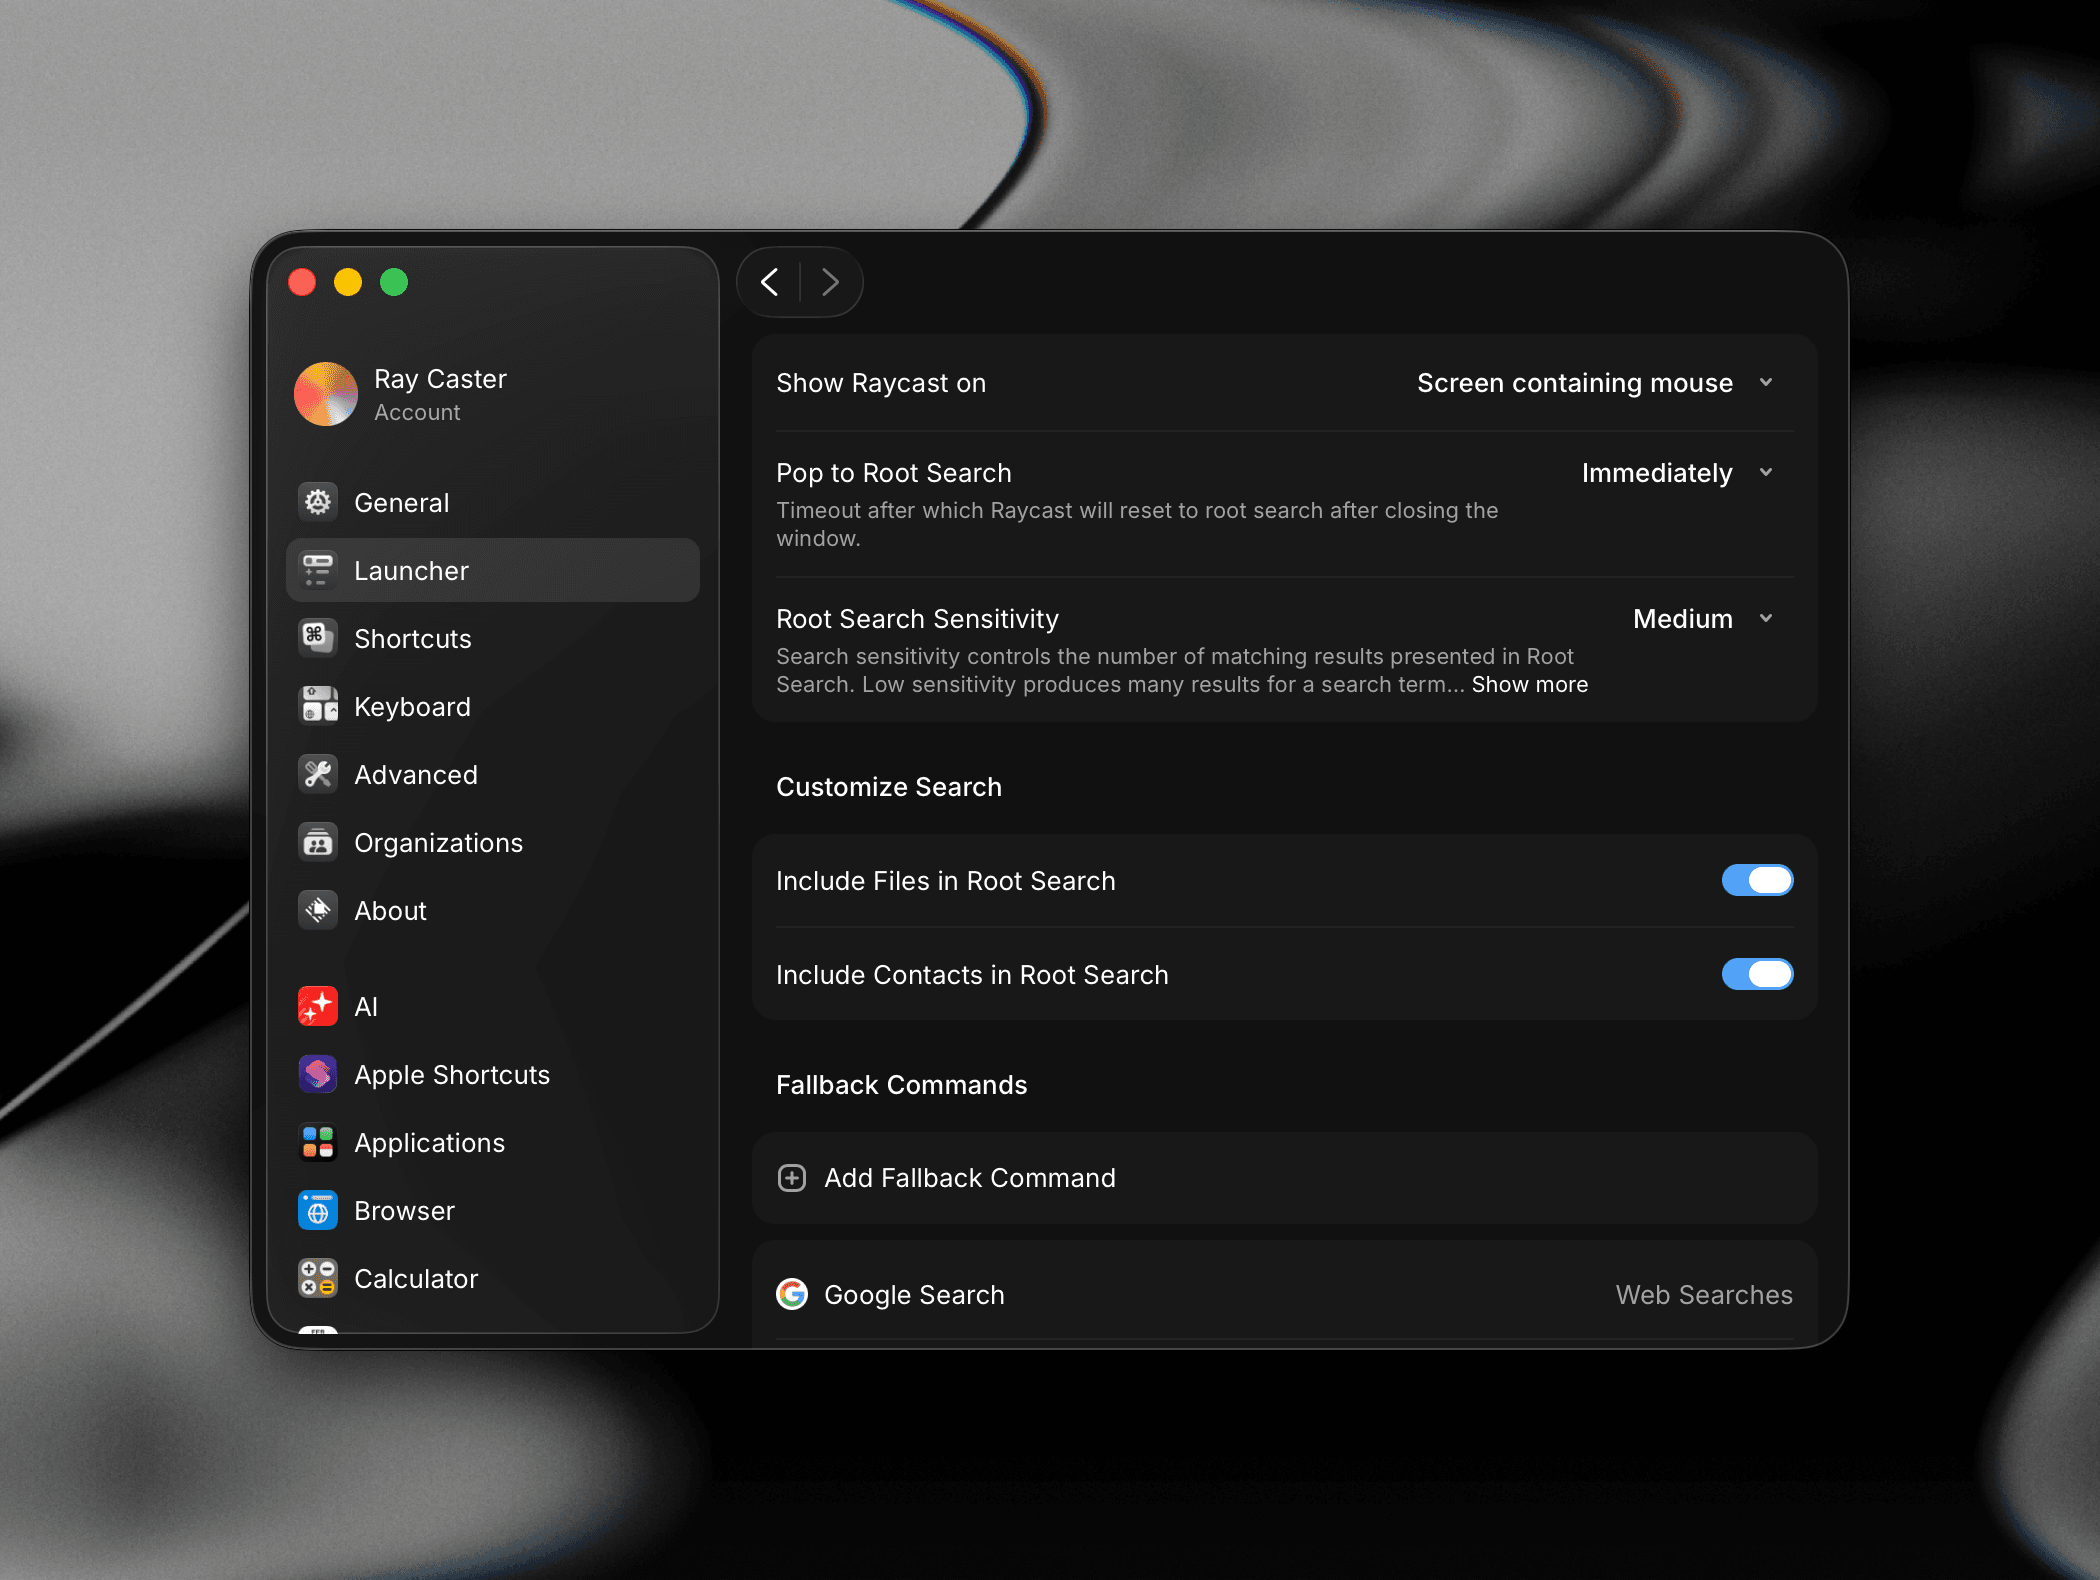
Show Raycast on
Choose which screen Raycast opens on in a multi-monitor setup: the Screen containing mouse, the Screen with active window, or your Primary screen.
Pop to Root Search
Set how long Raycast waits before resetting to Root Search after you close the window. Choose Immediately, or a delay of up to 180 seconds if you want Raycast to stay where you left it for a while after dismissing it.
Root Search Sensitivity
Control how many matching results Root Search surfaces. Low sensitivity returns more results for a given term, while High sensitivity shows fewer, closer matches.
Search History
Reset the list of recent searches that Raycast restores when you press the up arrow in Root Search.
Customize Search
Choose which additional sources appear in Root Search alongside your apps, commands, and extensions:
- Files: include matches from File Search in your results.
- Contacts: include people from your Apple Contacts.
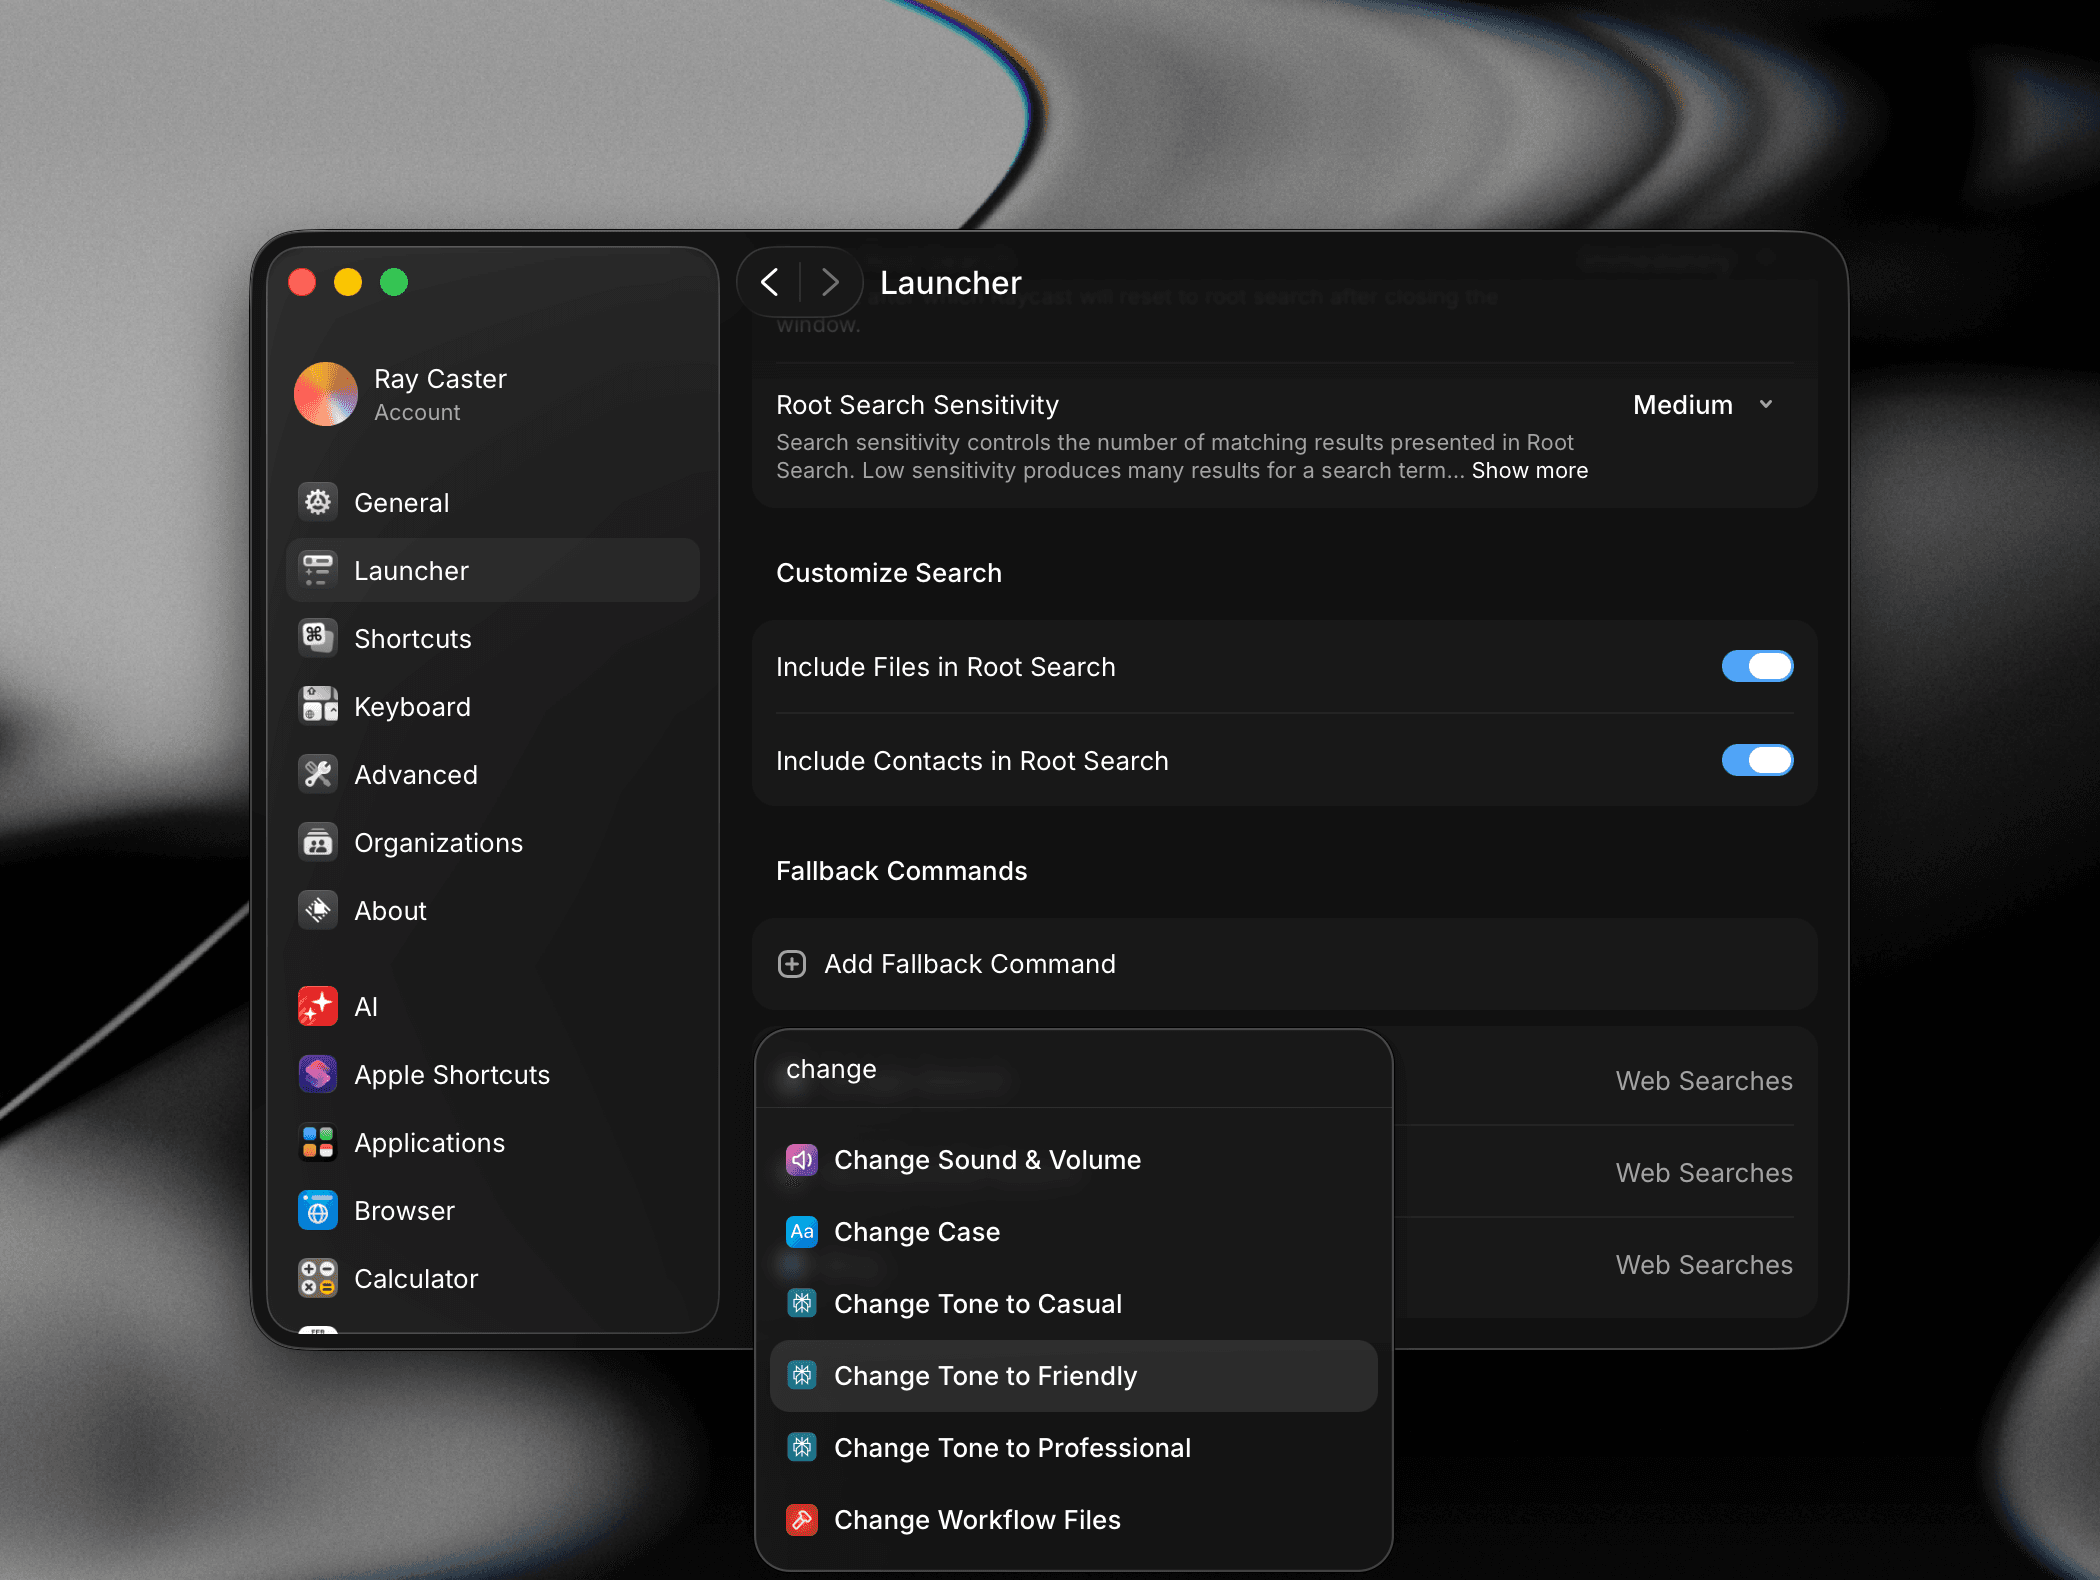
Fallback Commands
Configure which commands appear at the bottom of Root Search results when your query has no matches. Add commands from any extensions, use to reorder them, and use to remove ones you don't want.
Shortcuts
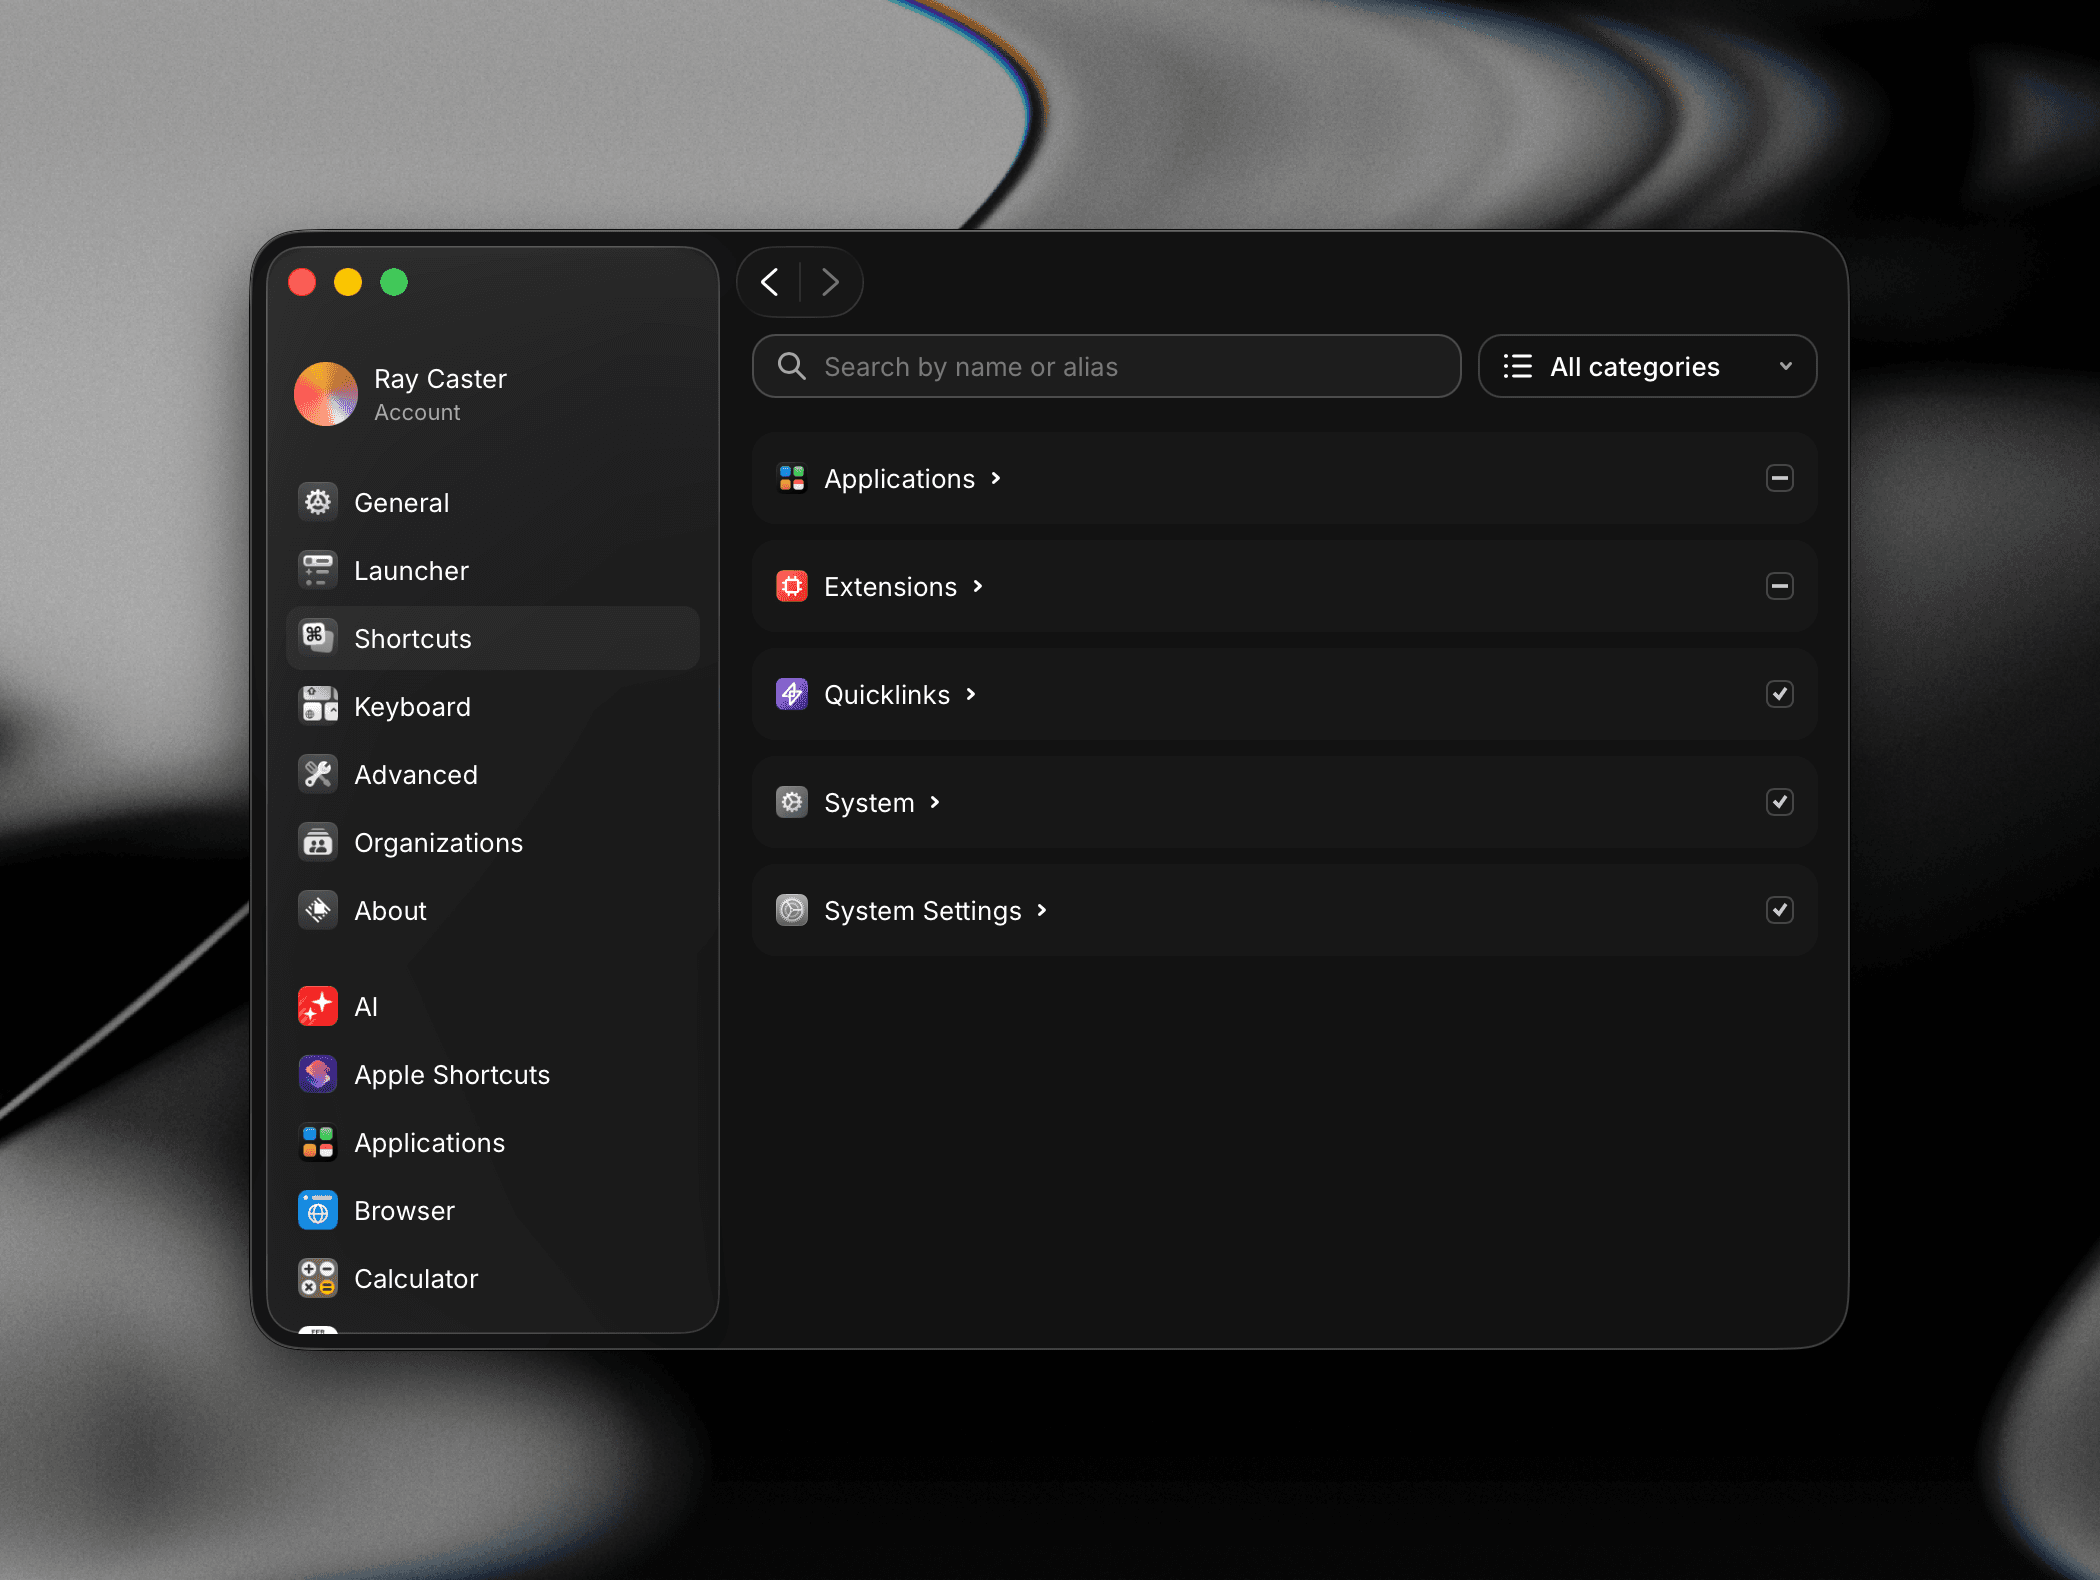
The Shortcuts tab gives you a bird's-eye view of every shortcut assigned across Raycast. You can filter by category and see which commands already have hotkeys or aliases. This is the central place to manage all your shortcuts at a glance, rather than navigating into individual extension tabs.
You can also assign shortcuts from each extension's dedicated tab in Settings, or directly from the Action Panel in Root Search.
You can now assign hotkeys and aliases directly from the Action Panel in Root Search, no need to open Settings first.
The hotkey recorder has been completely rebuilt with support for single-tap fn key on macOS and on Windows as a modifier, improved conflict detection, and the ability to overwrite conflicting shortcuts.
You can now assign left and right modifier keys as hotkeys. Simply click on the key when you set it up in Settings → Shortcuts
Keyboard
The Keyboard tab lets you customize how you navigate within Raycast using your keyboard.
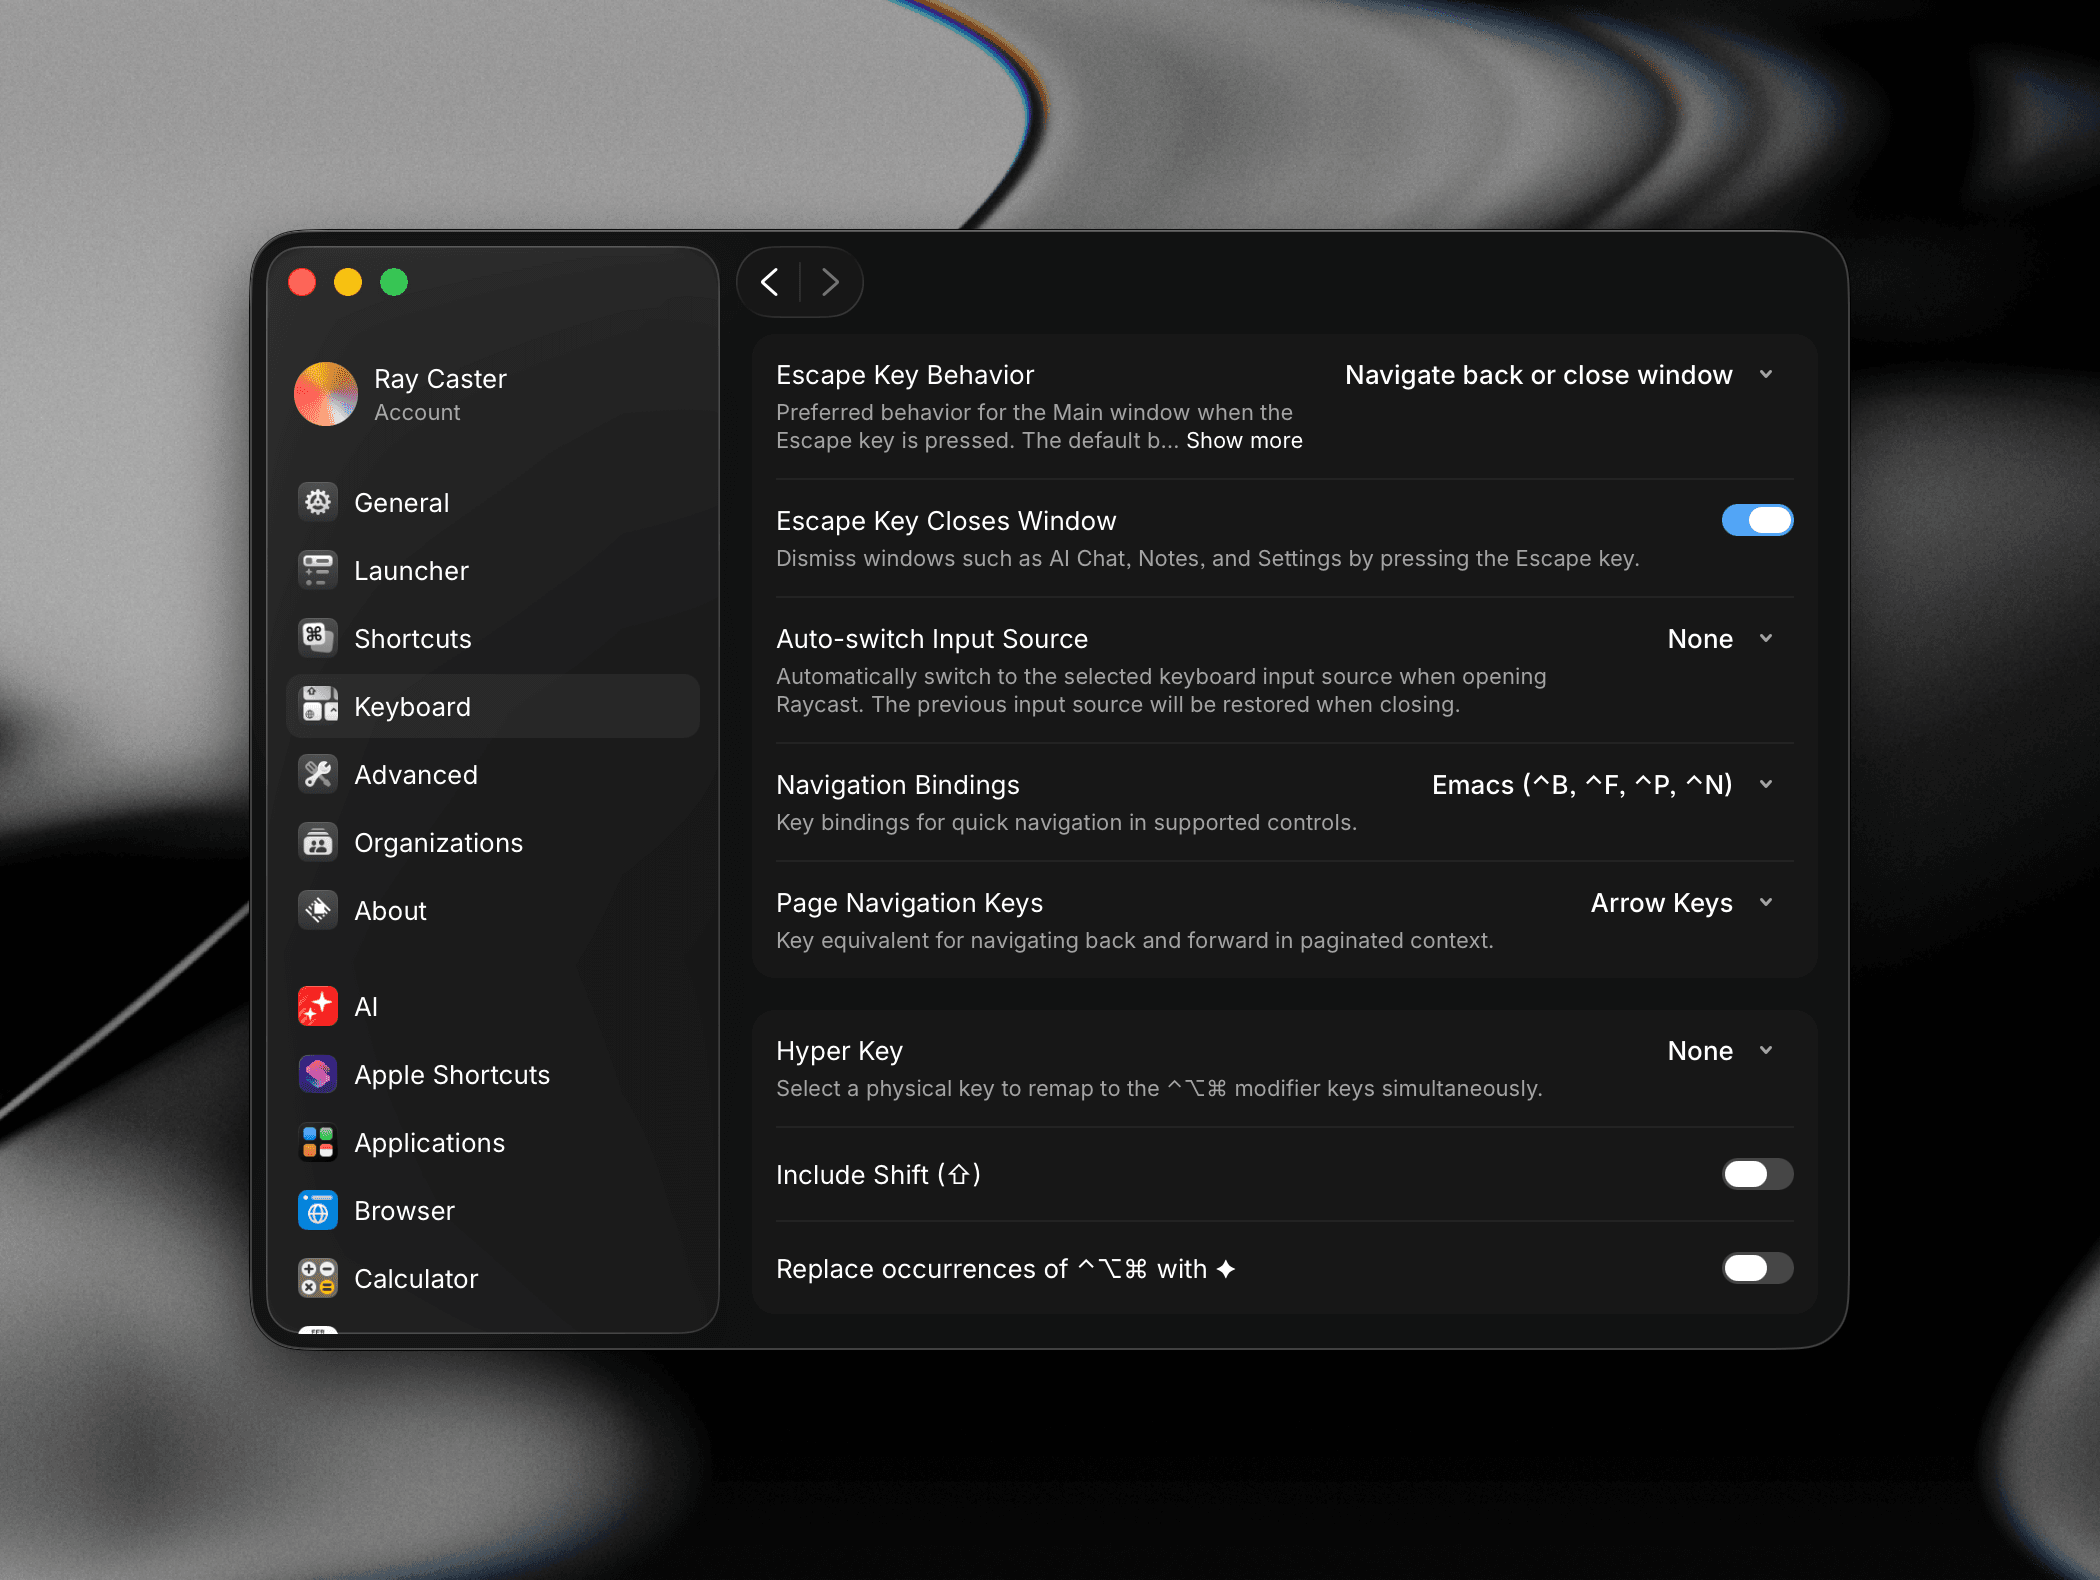
Hyper Key
Turn a key you rarely use into an extra modifier for your shortcuts. See Hyper Key.
Escape Key Behavior
Choose what happens when you press Esc in the main window:
- Navigate back or close window: go back one step, or close Raycast when you're already in Root Search.
- Close window and pop to root: close Raycast straight away and return to Root Search next time.
Escape Key Closes Window
Dismiss windows such as AI Chat, Notes, and Settings by pressing Esc. On by default. Raycast Notes has its own Escape Key Loses Focus option that overrides this.
Auto-switch Input Source
Switch to a chosen keyboard input source whenever you open Raycast, and restore the previous one when you close it. Useful if you type in a non-Latin layout day to day but search in English. Defaults to None.
Navigation Bindings
Add key bindings for quick navigation in lists and other supported controls:
- Emacs: ⌃B / AltB, ⌃F / AltF, ⌃P / AltP, ⌃N / AltN
- Vim Motions: ⌃H / AltH, ⌃L / AltL, ⌃K / AltK, ⌃J / AltJ
Page Navigation Keys
Choose the keys for moving back and forward in paginated views: Square Brackets or Arrow Keys.
Advanced
The Advanced tab provides additional configuration for power users.
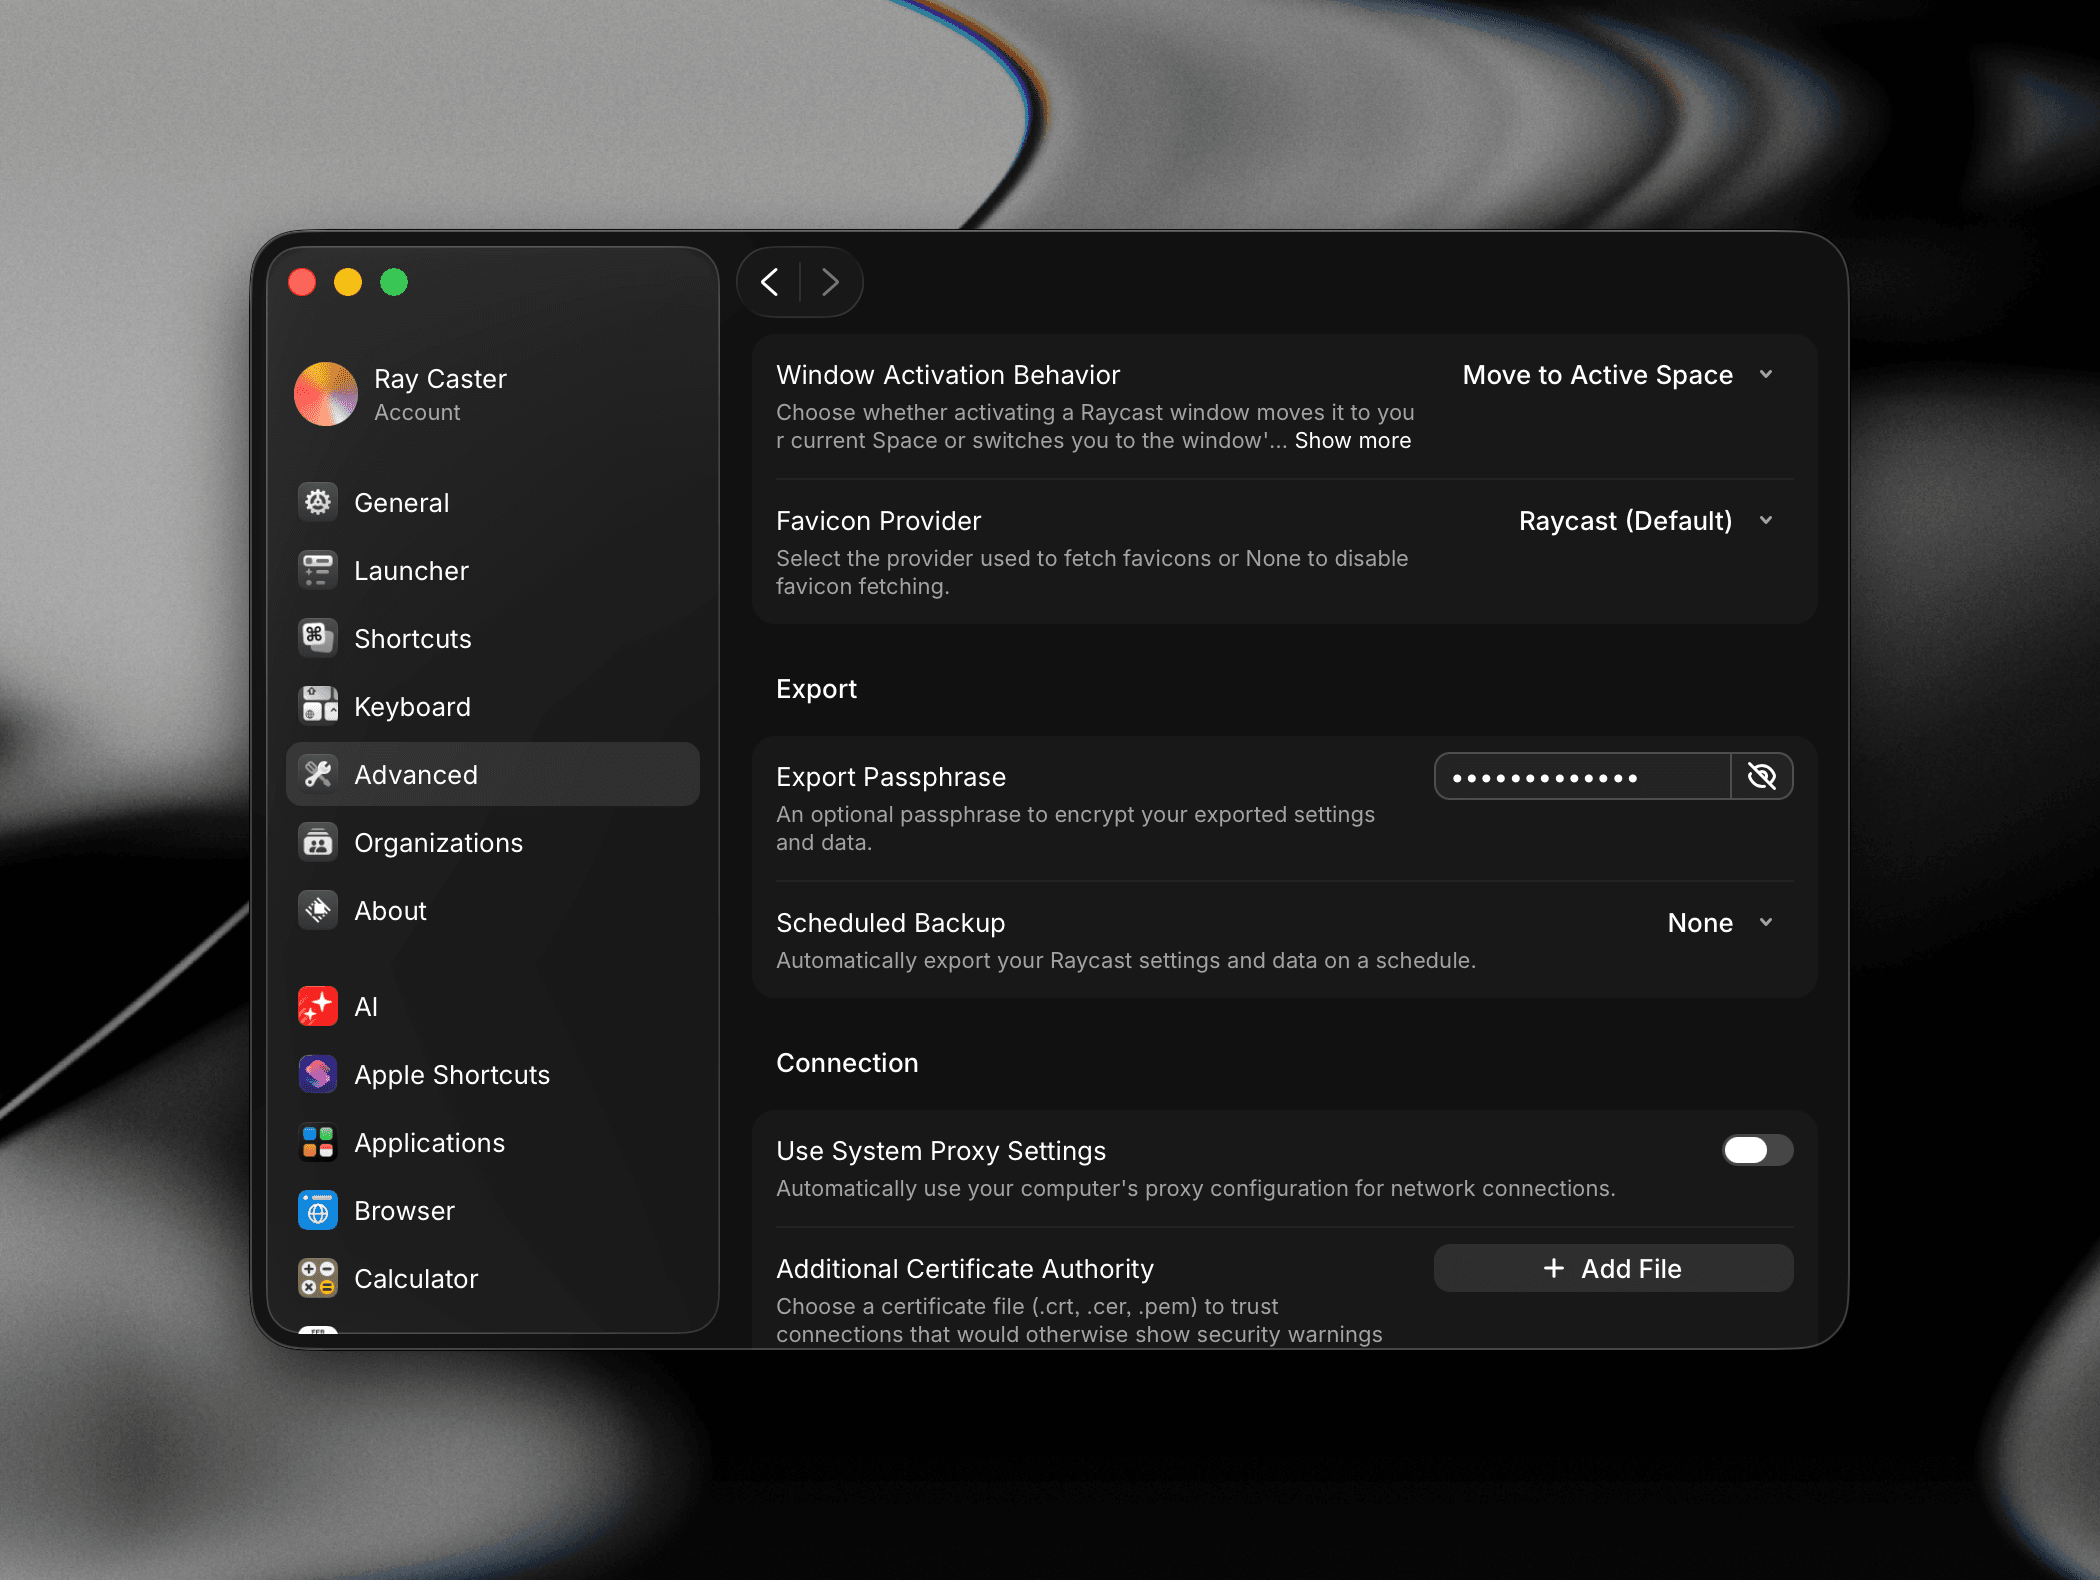
Window Activation Behavior
Choose what happens when you activate Raycast while one of its windows is open on another macOS Space:
- Move to Active Space: bring the window to the Space you're currently on.
- Switch Space: switch to the Space where the window is already open.
Favicon Provider
Choose the service Raycast uses to fetch website icons (favicons) shown next to links and Quicklinks: DuckDuckGo, Google, or Raycast (the default). Select None to disable favicon fetching.
Open Folders in Tabs
Open folders as new tabs in an existing File Explorer window instead of launching a new window each time.
Run Accessibility Helper Elevated
Turn this on if global shortcuts, snippet expansion, or copying selected text don't work in some apps on your PC. Raycast then launches its input helper with administrator rights through the Raycast System Service. It needs an administrator account and has no effect on standard Windows accounts. Restart Raycast for the change to take effect.
Export & Import Settings
Export your full Raycast configuration to a file and import it on another machine. This transfers your extensions, hotkeys, aliases, and preferences so you can set up a new machine quickly.
If you use Raycast on multiple machines, export your settings periodically so you always have a recent backup available.
Connection
Control how Raycast connects to the network:
- Use System Proxy Settings: automatically route Raycast's traffic through your computer's proxy configuration.
- Additional Certificate Authority: trust a custom certificate (
.crt,.cer, or.pem) so connections that would otherwise fail or show security warnings are allowed.
Organizations
If you are part of a Raycast Teams plan, the Organizations tab lets you view and manage your team membership. You can see which organization you belong to, switch between organizations, and access team-specific settings and policies configured by your admin.
About
The About tab shows your current Raycast version number, provides links to the Raycast website and changelog, and lets you submit feedback or bug reports. You can also check for updates here.
AI
The AI settings are where you configure how Raycast AI works for you — models and providers, agents, commands, extensions, memory, and the general behavior of AI Chat and Quick AI. Toggle the switch in the top right to enable or disable AI globally.
Models & Providers
The Models & Providers sub-pane manages which models Raycast AI can use and where they come from:
- Default Models: Pick the default model for AI Chat, Quick AI, and AI Commands. Learn more under Default Models on the AI Chat page.
- Local AI Subscriptions: Connect the Claude or ChatGPT subscription you already pay for and use its models in Raycast.
- API Keys: Bring your own API keys to use AI at your own cost and pay their standard rates directly.
- Custom Providers: Connect any OpenAI-compatible endpoint with a
providers.yamlconfig. - Local Models: Install and run local open models on your own machine.
- Manage Models: Choose which models appear in the model pickers, and compare their speed, intelligence, and context window. Learn more under Manage Models on the AI Chat page.
Agents, AI Commands & AI Extensions
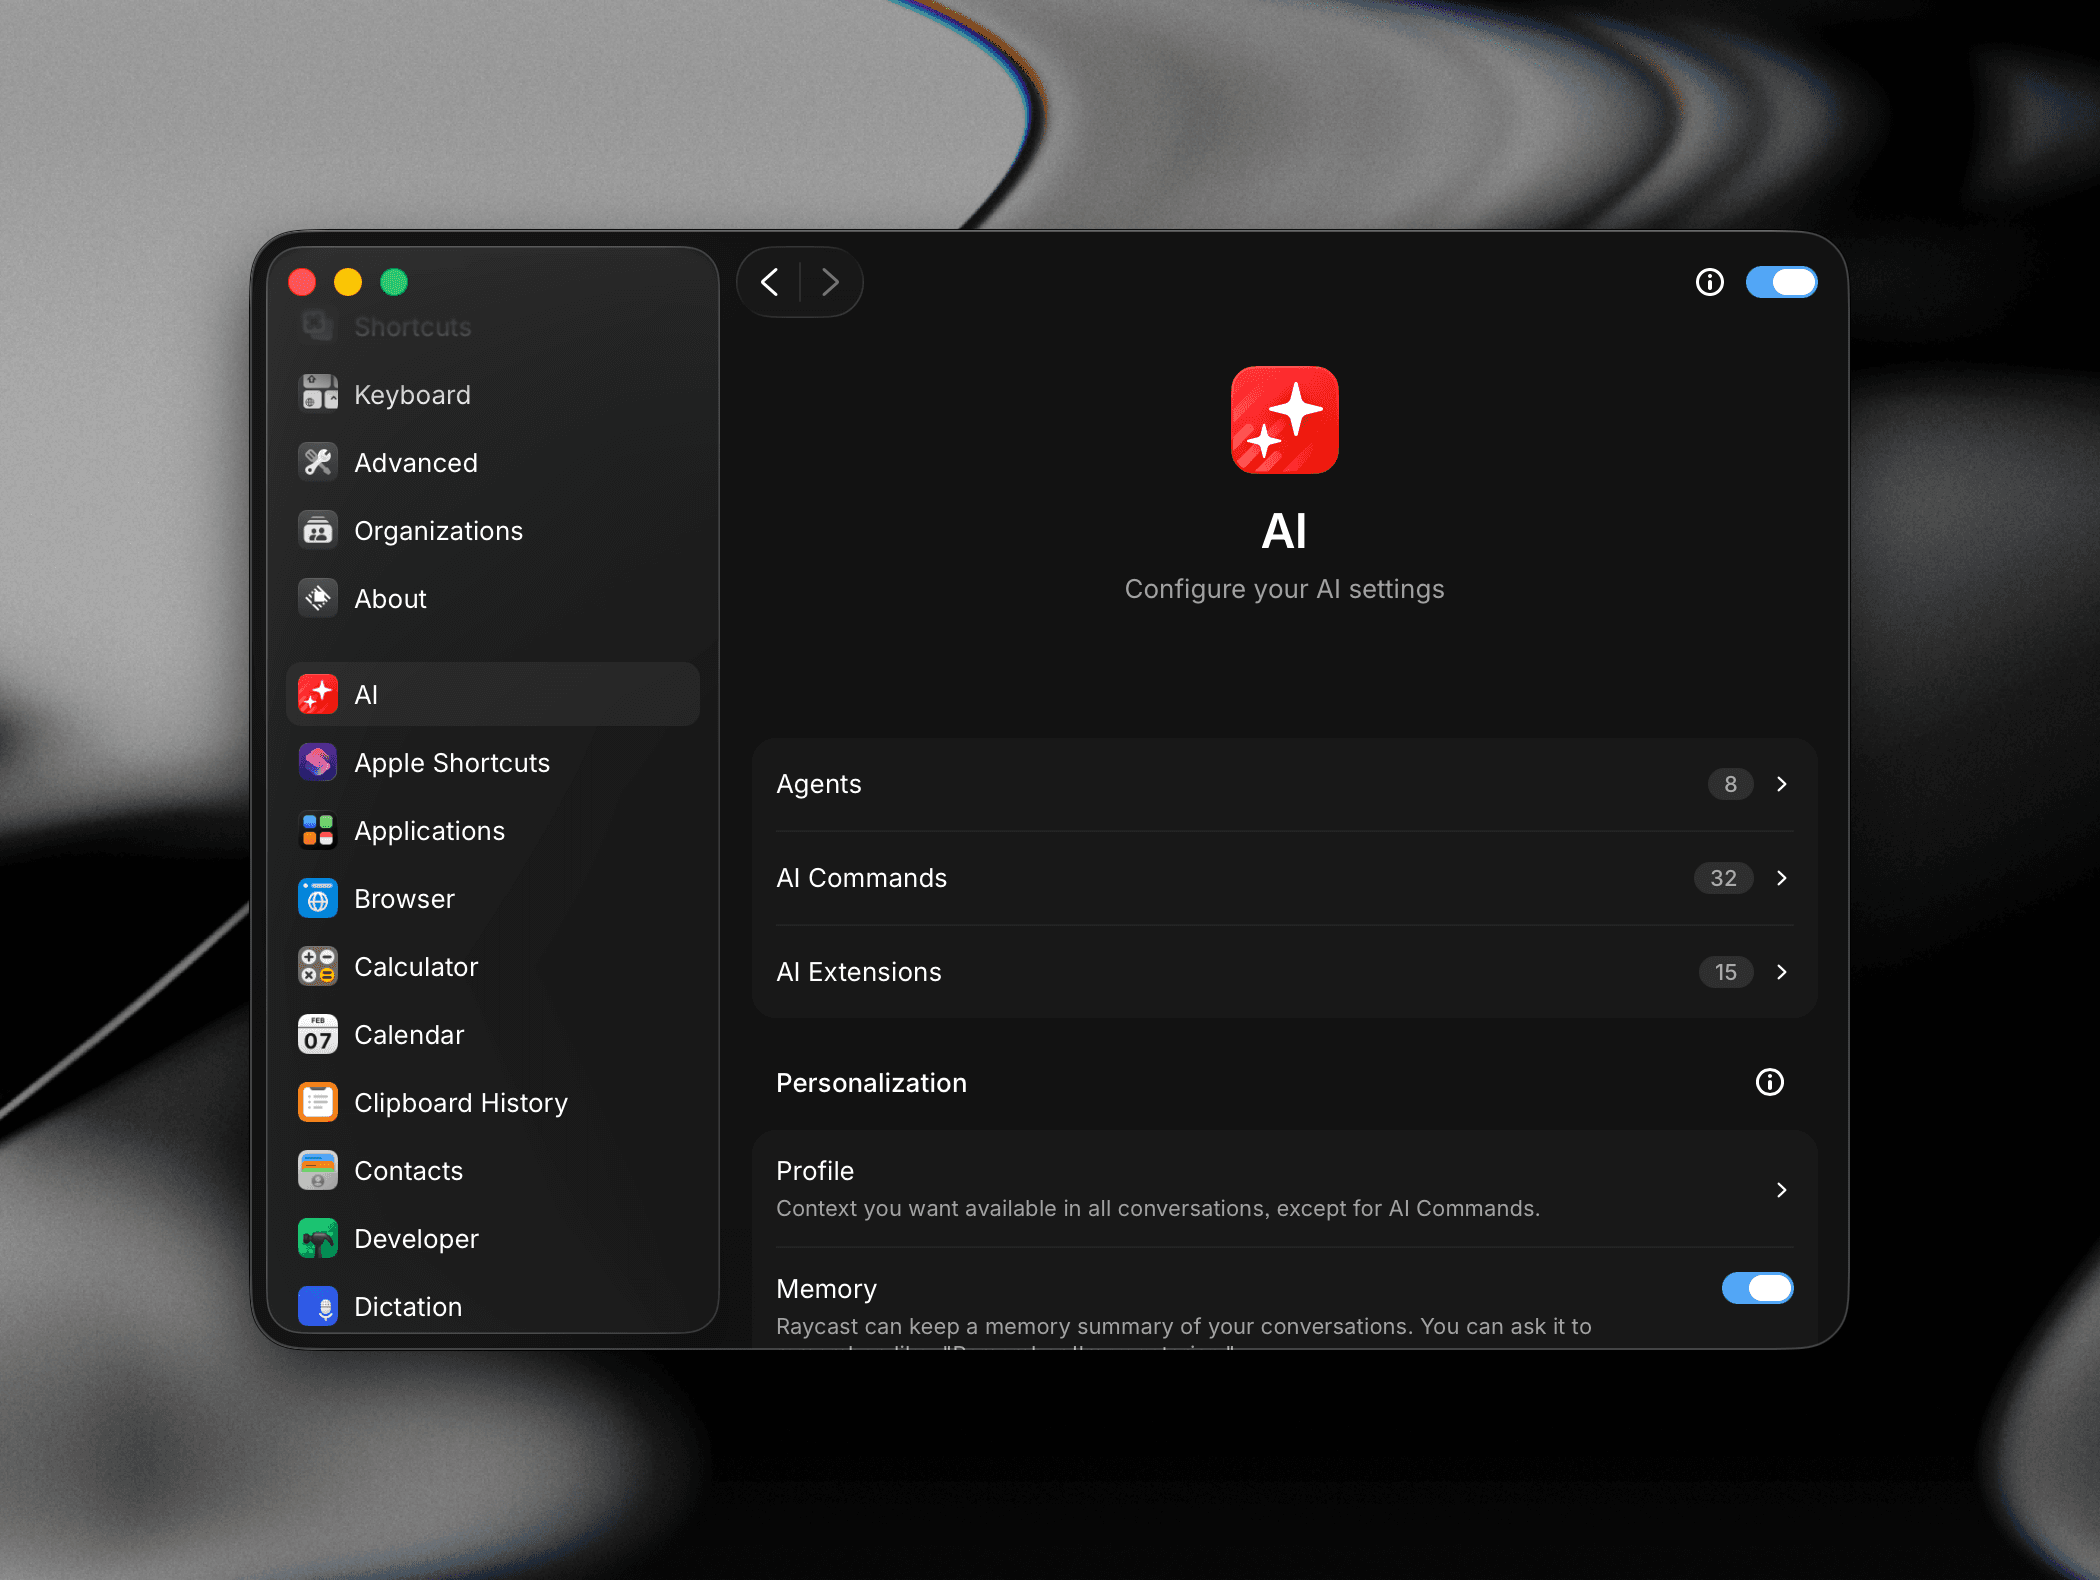
Three sub-panes manage everything you can build on top of AI:
- Agents: Your custom AI agents, each with their own instructions, tools, and personality.
- AI Commands: Reusable prompts you can trigger anywhere in Raycast (translate, summarize, fix grammar, etc.).
- AI Extensions: Extensions that AI can call as tools when answering you, letting it take real actions across your apps.
Projects
Create and edit your AI Chat Projects here with Add Project. Each project keeps related chats, instructions, and context together.
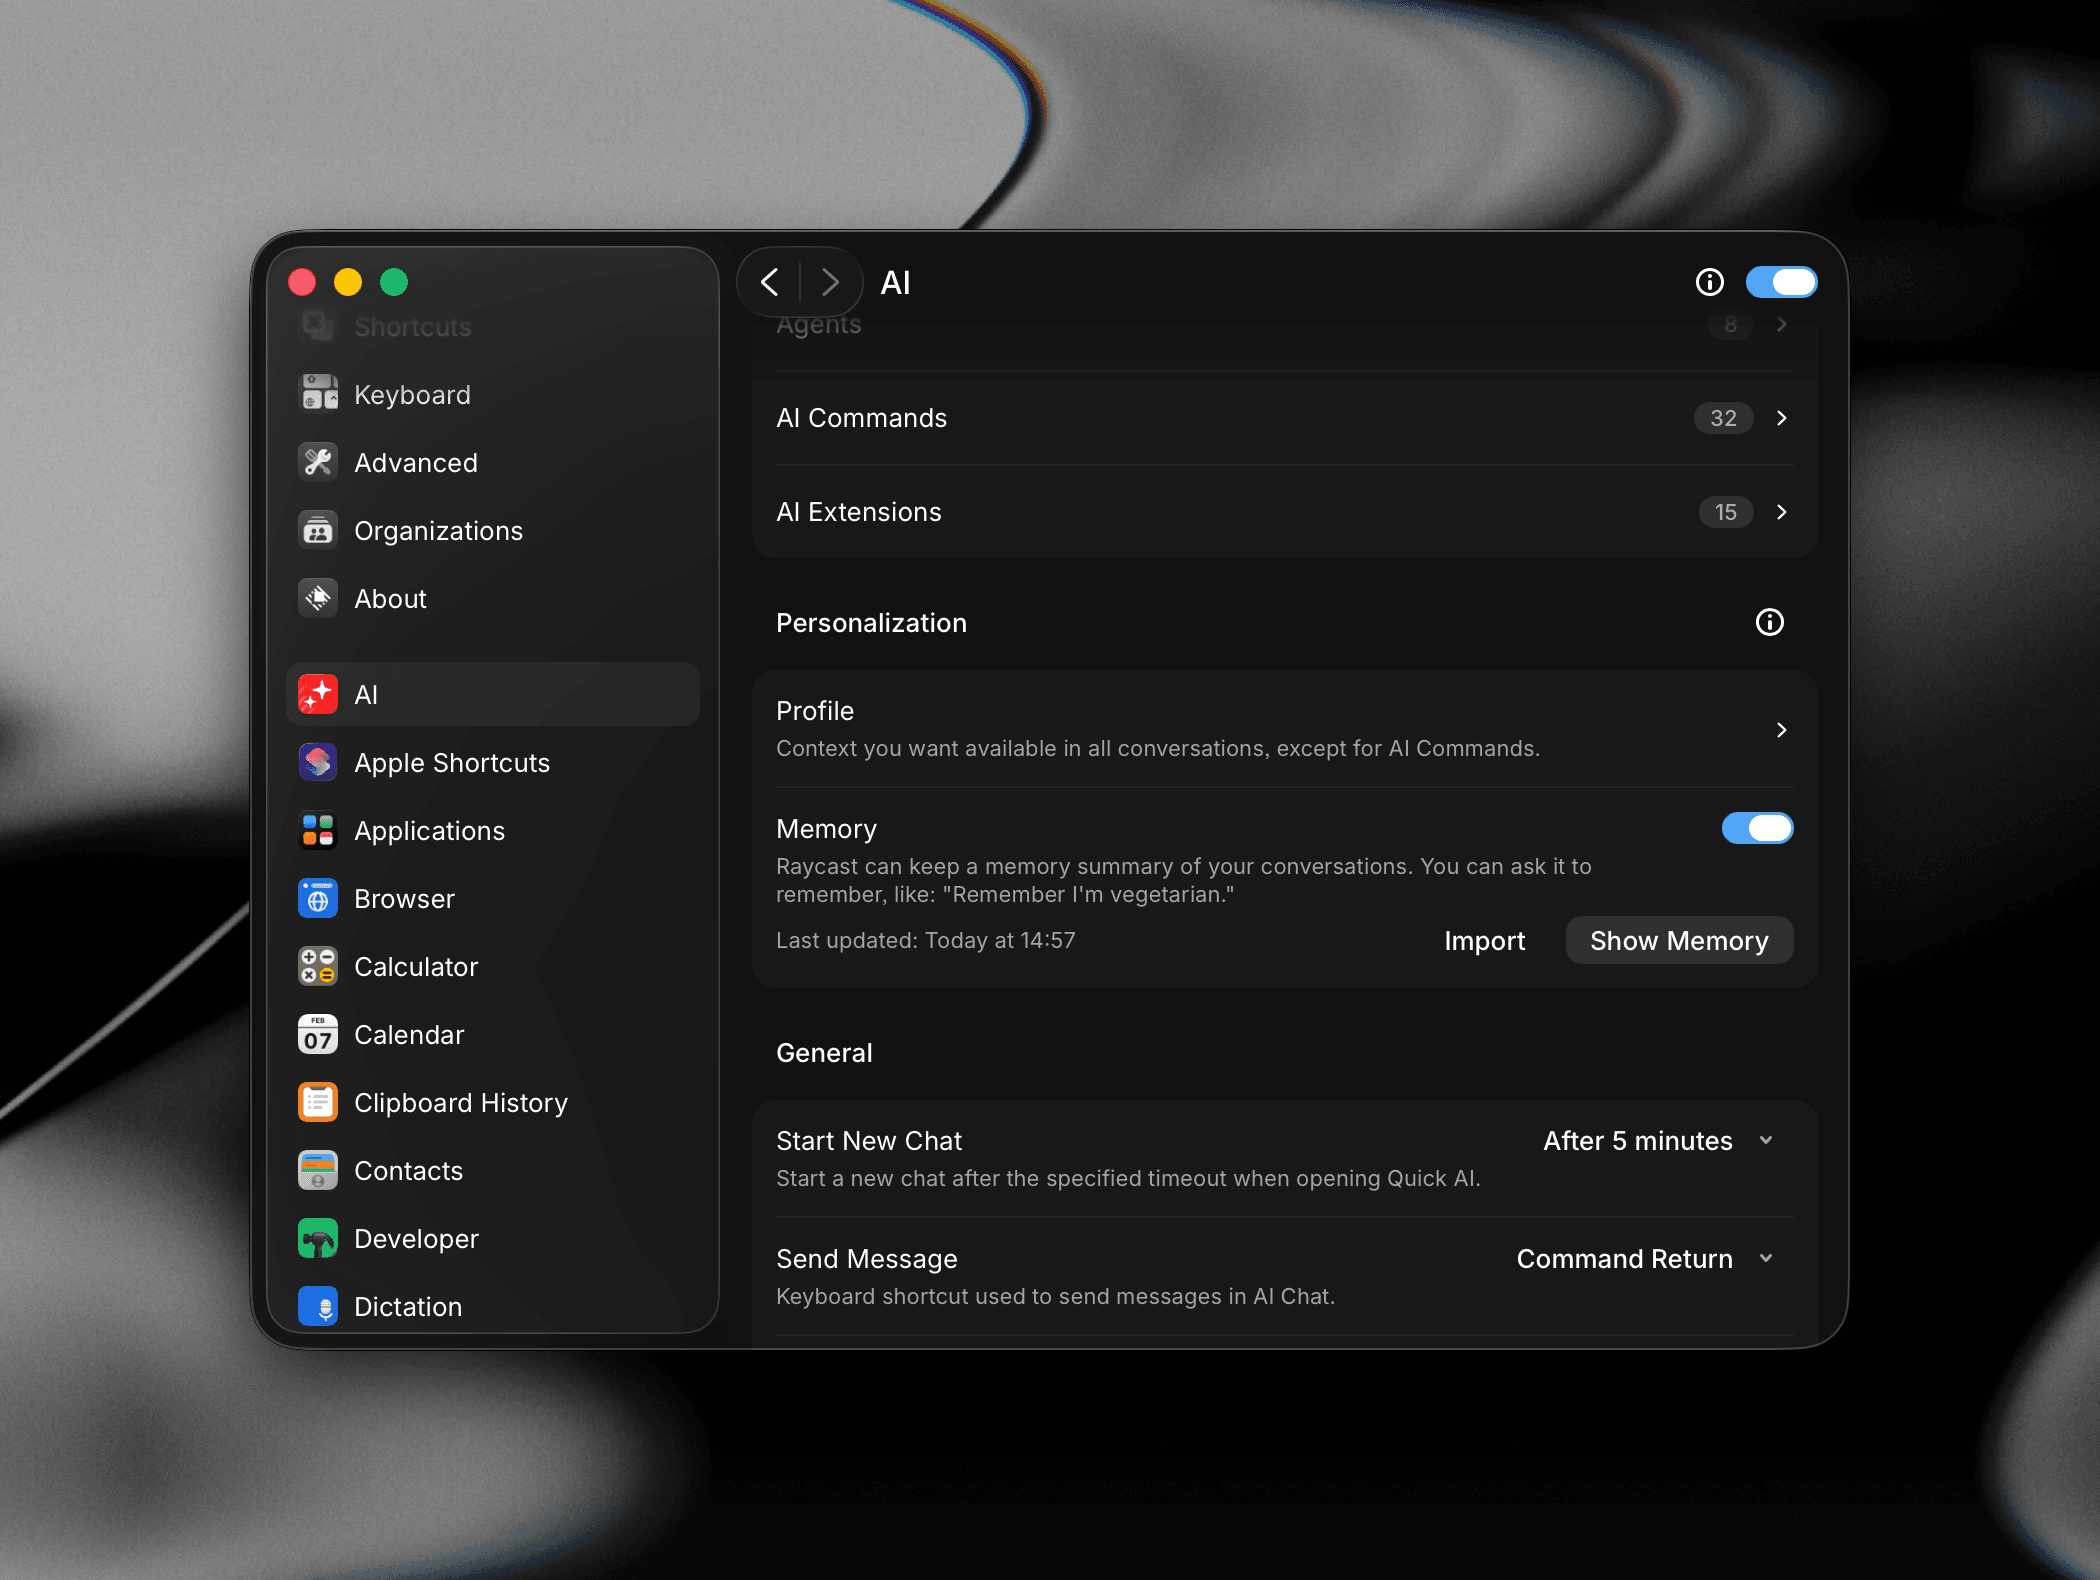
Personalization
Profile
Add context you want available in every conversation — your role, the tools you use, how you'd like AI to respond. The profile applies to AI Chat and Quick AI, but not to AI Commands (which run with their own dedicated prompts).
Memory
When Memory is on, Raycast keeps a running summary of details from your conversations and reuses them automatically. Just tell it what to remember in any chat — for example, "Remember I'm vegetarian."
Use Show Memory to review or edit what's stored, or Import to bring in memory from another source.
Chat
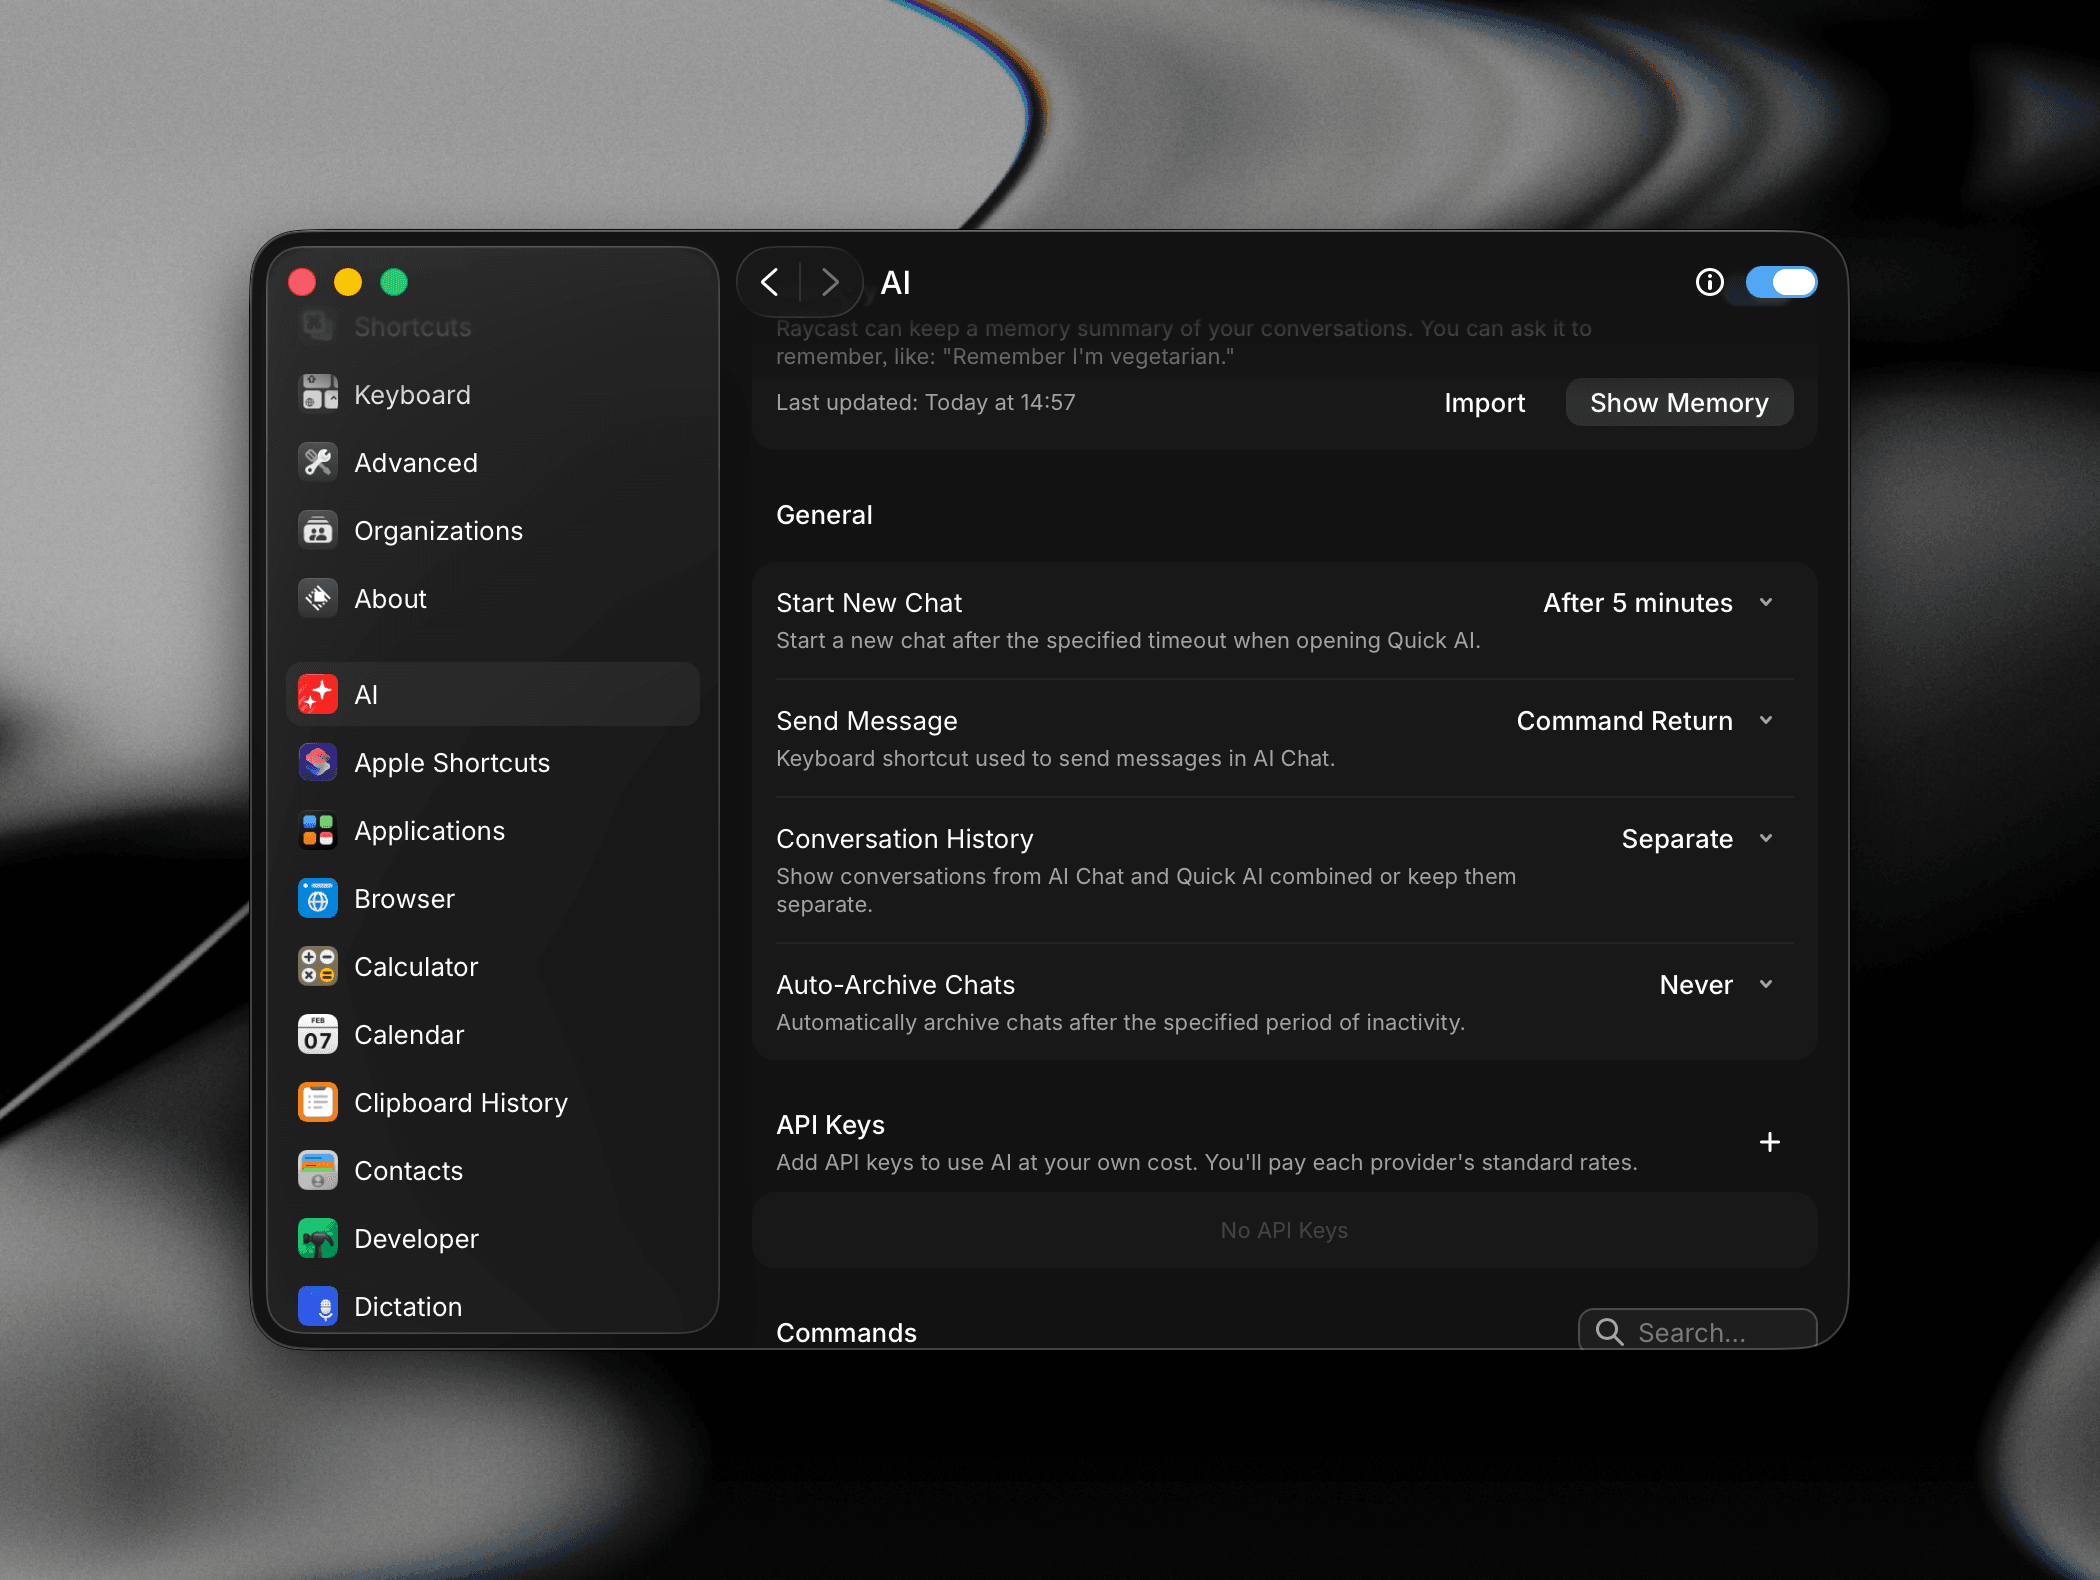
- Start New Chat: How long Quick AI waits before starting a fresh conversation when you reopen it. Default is After 5 minutes.
- Send Message: The keyboard shortcut used to send messages in AI Chat. Default is ⌘ Return.
- Conversation History: Choose whether AI Chat and Quick AI conversations live in a combined history or stay Separate.
- Auto-Archive Chats: Automatically archive chats after a period of inactivity. Default is Never.
- Background Notifications: Show a system notification when a chat finishes in the background. See Background Notifications.
- Prevent Sleep During AI Runs: Keep this computer awake while AI is working. Off by default. Turn it on if you leave long tasks or Automations running unattended.
Warnings
Choose which actions ask for confirmation first. Each one is on by default, and turns off when you choose not to be asked again on the confirmation. Turn it back on here to restore the prompt.
- Show Warning Before Deleting Chats
- Show Warning Before Deleting Agents
- Show Warning Before Deleting AI Commands
- Show Warning Before Deleting Automations
- Show Warning Before Editing Messages
Tools
- Permissions: Controls whether tools from AI Extensions, MCP servers, and Raycast itself need approval before running. Ask prompts for anything that isn't read-only or allowed by a rule. Auto, the default on paid plans, also approves routine actions automatically. Always Allow runs everything without asking. Free plans use Ask. Individual chats can override this.
- Auto-review Rules: Shown when Permissions is set to Auto. Natural-language rules that customize what Auto can run in every chat. Select Add Rules (or Manage Rules once you have some) and fill in "When Raycast wants to:" and whether it should Allow automatically or Ask first. Ask first wins if rules conflict. Requires Raycast Pro.
- Globally Allowed Tools: Tools that run without approval in every chat because you chose Always allow on an approval card. Select See Allow List to open the list, where you can remove a specific tool or Reset All to clear them at once. Per-chat approvals stay with their chat.
Learn more under Permissions on the AI Extensions page.
Commands
The AI extension ships with a full set of built-in commands you can alias, hotkey, or disable individually
Applications
The Applications settings let you fine-tune how Raycast finds, launches, and manages your installed apps: Auto Quit, Hotkey Action, Search Scopes, and per-app aliases and hotkeys. See Applications for every option.
Extensions
Below the list of Applications, each installed extension appears as its own entry in the sidebar. Select any extension to manage its preferences, authenticate with third-party services, enter access tokens, and assign shortcuts to its commands.
Browsing Extensions
Extensions are grouped into categories in the left sidebar: Built-in commands, Store extensions, Script Commands, and Quicklinks. Select any extension to see its commands and settings.
Enabling & Disabling Commands
Each command has a toggle to enable or disable it. Disabled commands won't appear in Root Search. This is useful for hiding commands you don't use to keep your search results clean.
Extension-Specific Settings
Many extensions expose their own configuration options. For example, a Jira extension might ask you to log in, or a GitHub extension might let you choose a default repository. These settings appear when you select the extension in the sidebar.
Uninstalling Extensions
To remove a Store extension, select it in the sidebar and click the Uninstall button, or right-click the extension and choose Uninstall.