

SCIM Provisioning
Support for Enterprise features in Raycast for Windows has not yet been added. Contact us if you require these features in your organization.
SCIM (System for Cross-domain Identity Management) allows you to automatically provision and deprovision Raycast user accounts from your identity provider. This ensures that when employees join or leave your organization, their Raycast access is updated automatically.
Supported operations:
- Create Users: Automatically create Raycast accounts when users are assigned in your IdP
- Update Users: Sync profile changes from your IdP to Raycast
- Deactivate Users: Automatically remove Raycast access when users are unassigned
Provision with Okta
- In the Application General tab → App Settings press Edit and select SCIM for Provisioning
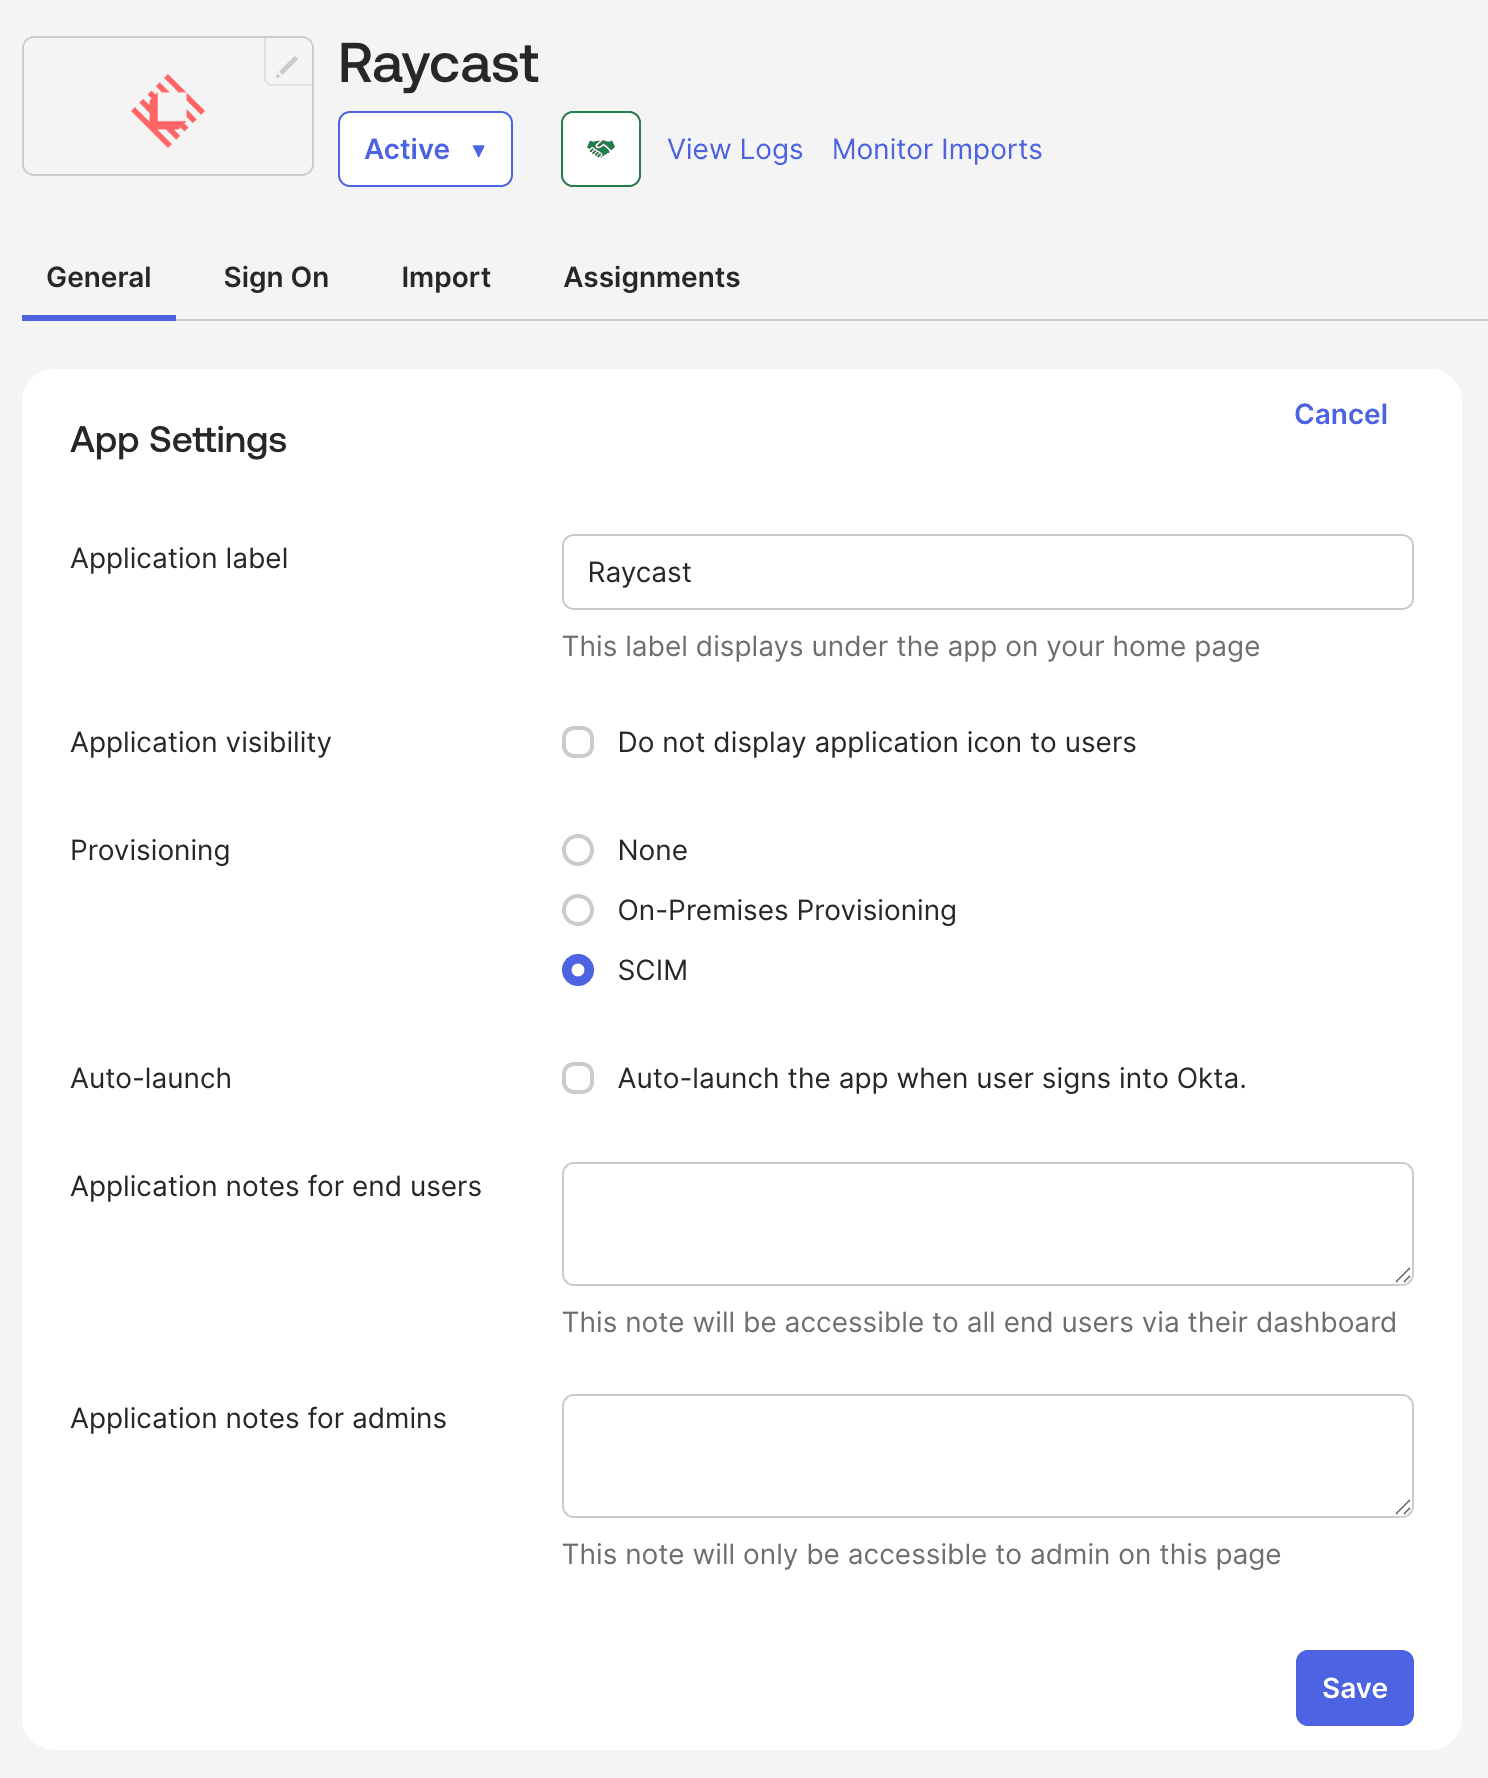
- Press Save
- Navigate to the Provisioning tab and press Edit
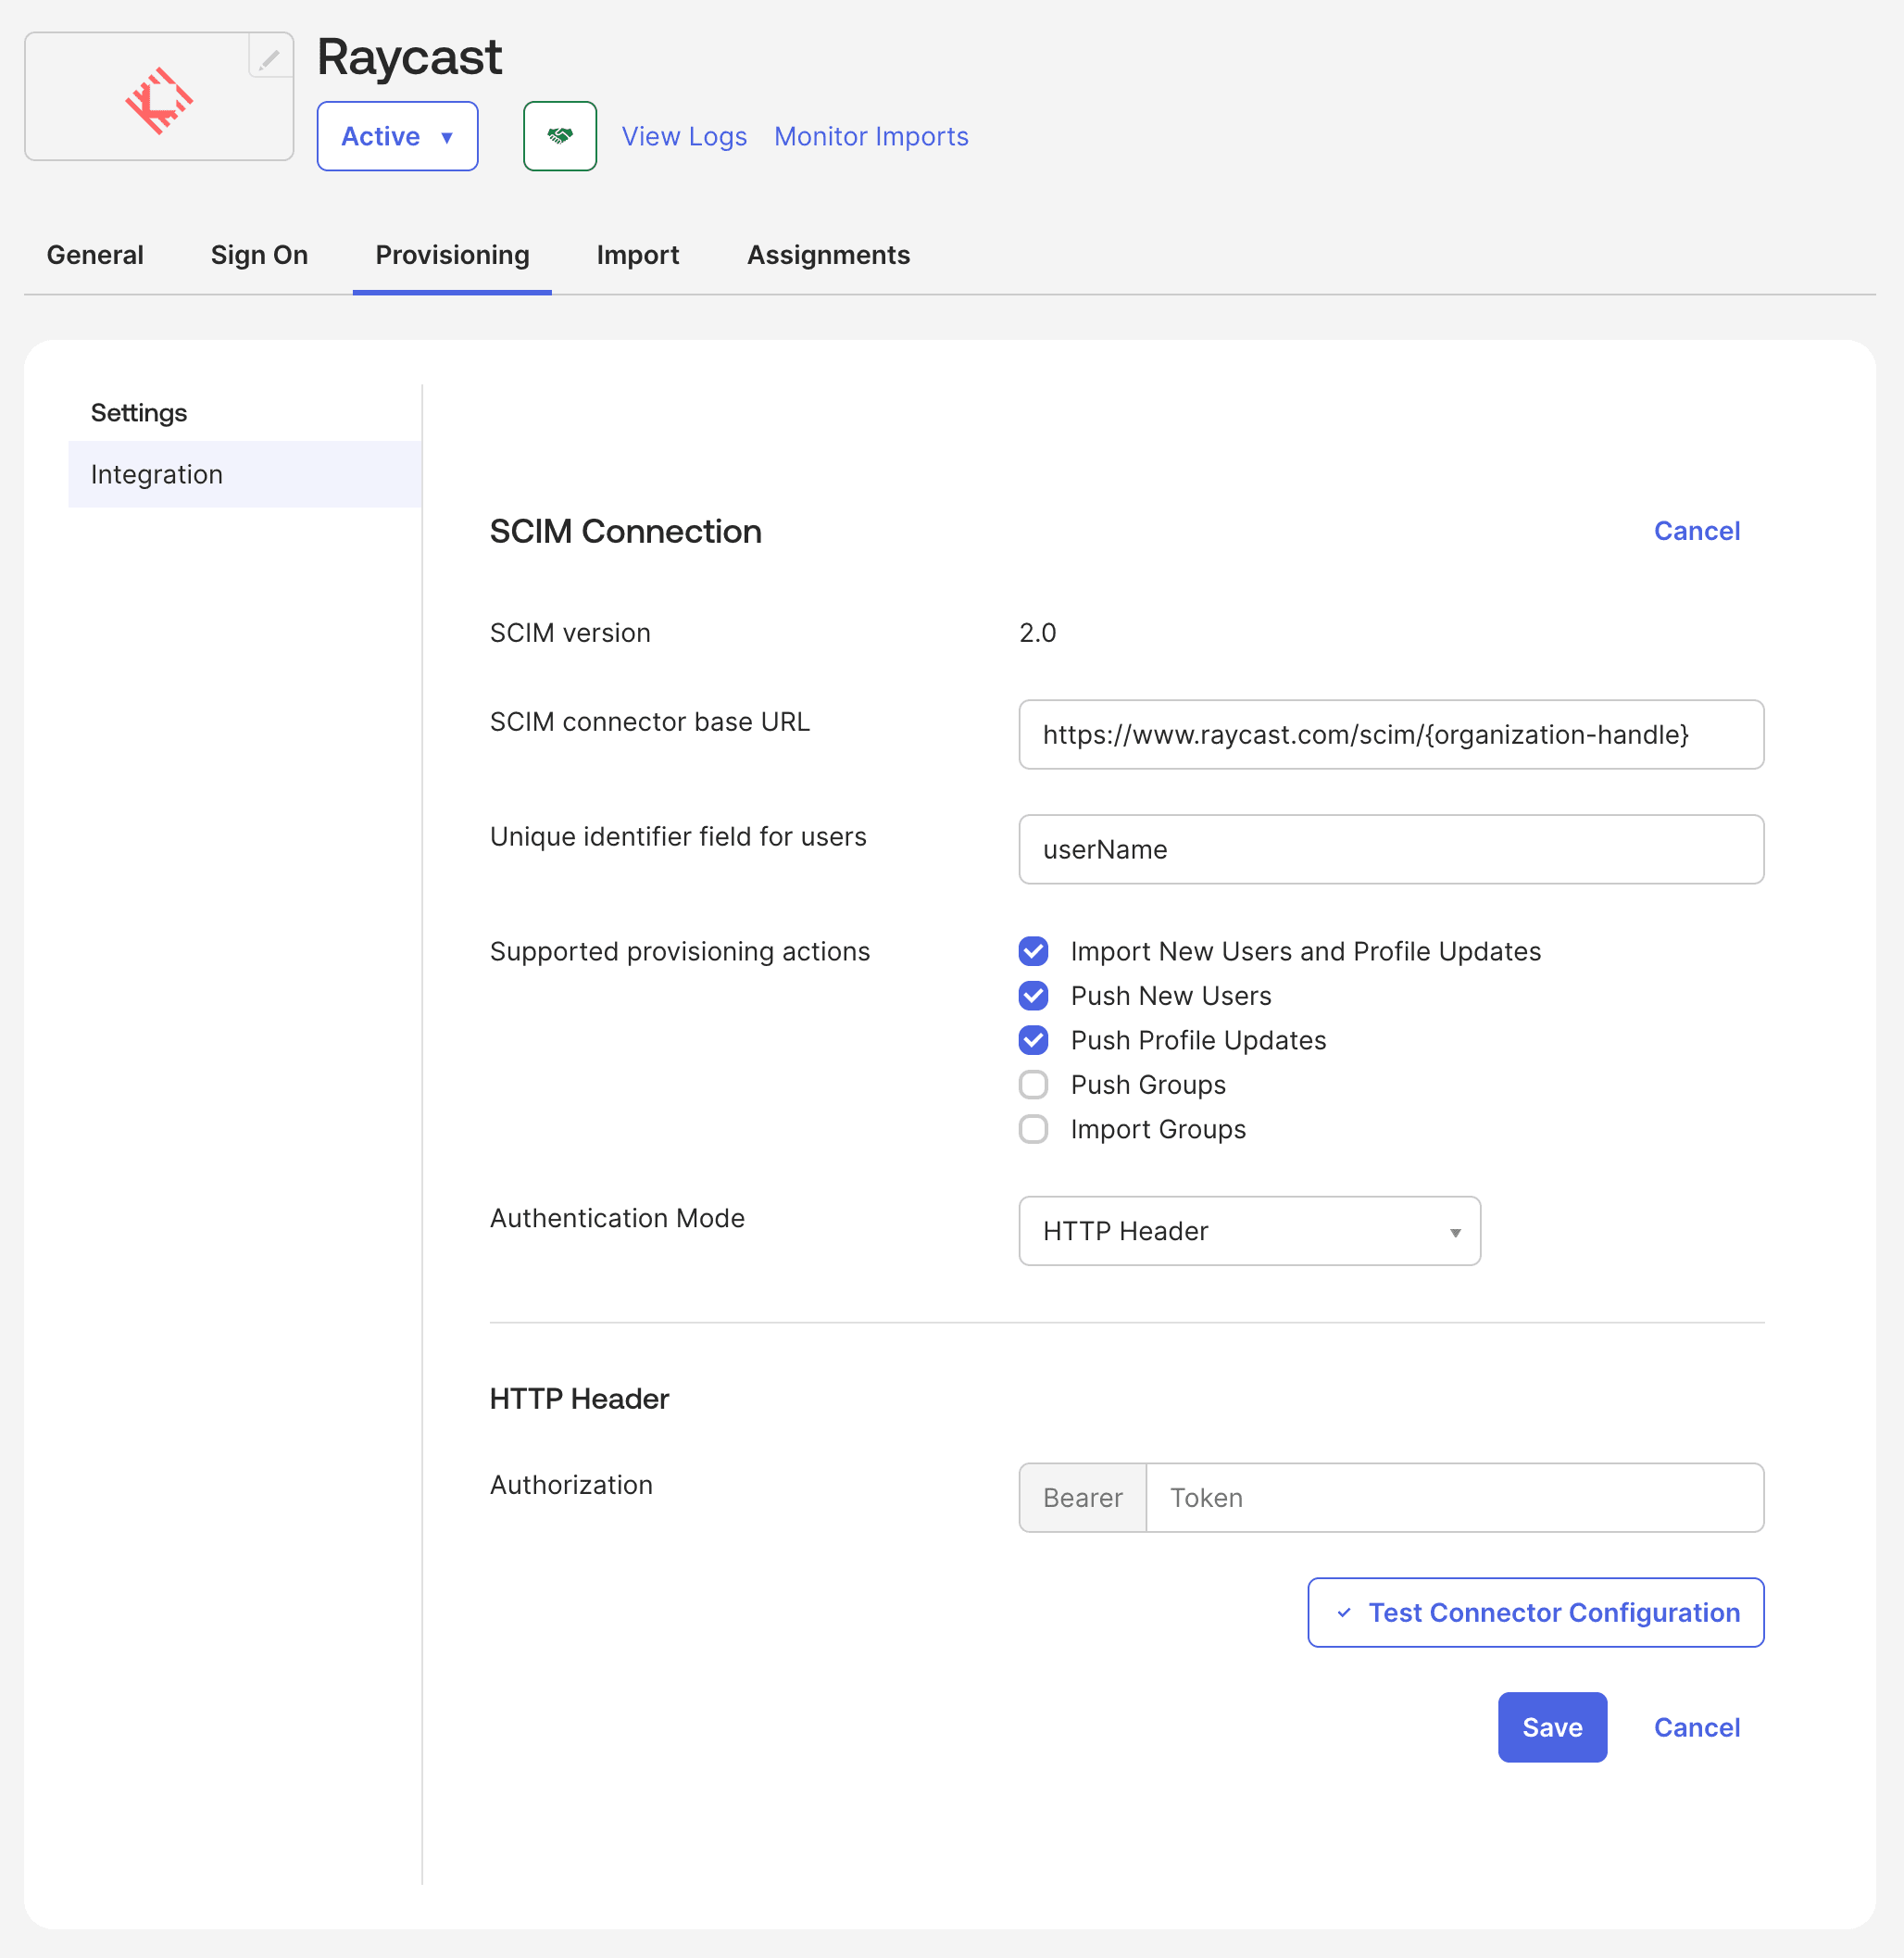
- Fill out the SCIM Connection settings
- SCIM connector base URL:
https://www.raycast.com/scim/{organization-handle} - Unique identifier field for users:
userName - Supported provisioning actions: Select the first 3 items
- Authentication Mode:
HTTP Header - Authorization: Paste the SCIM Token that Raycast shared with you through 1Password
- SCIM connector base URL:
- On the To App section, select the first three checkboxes: Create Users, Update User Attributes and Deactivate Users
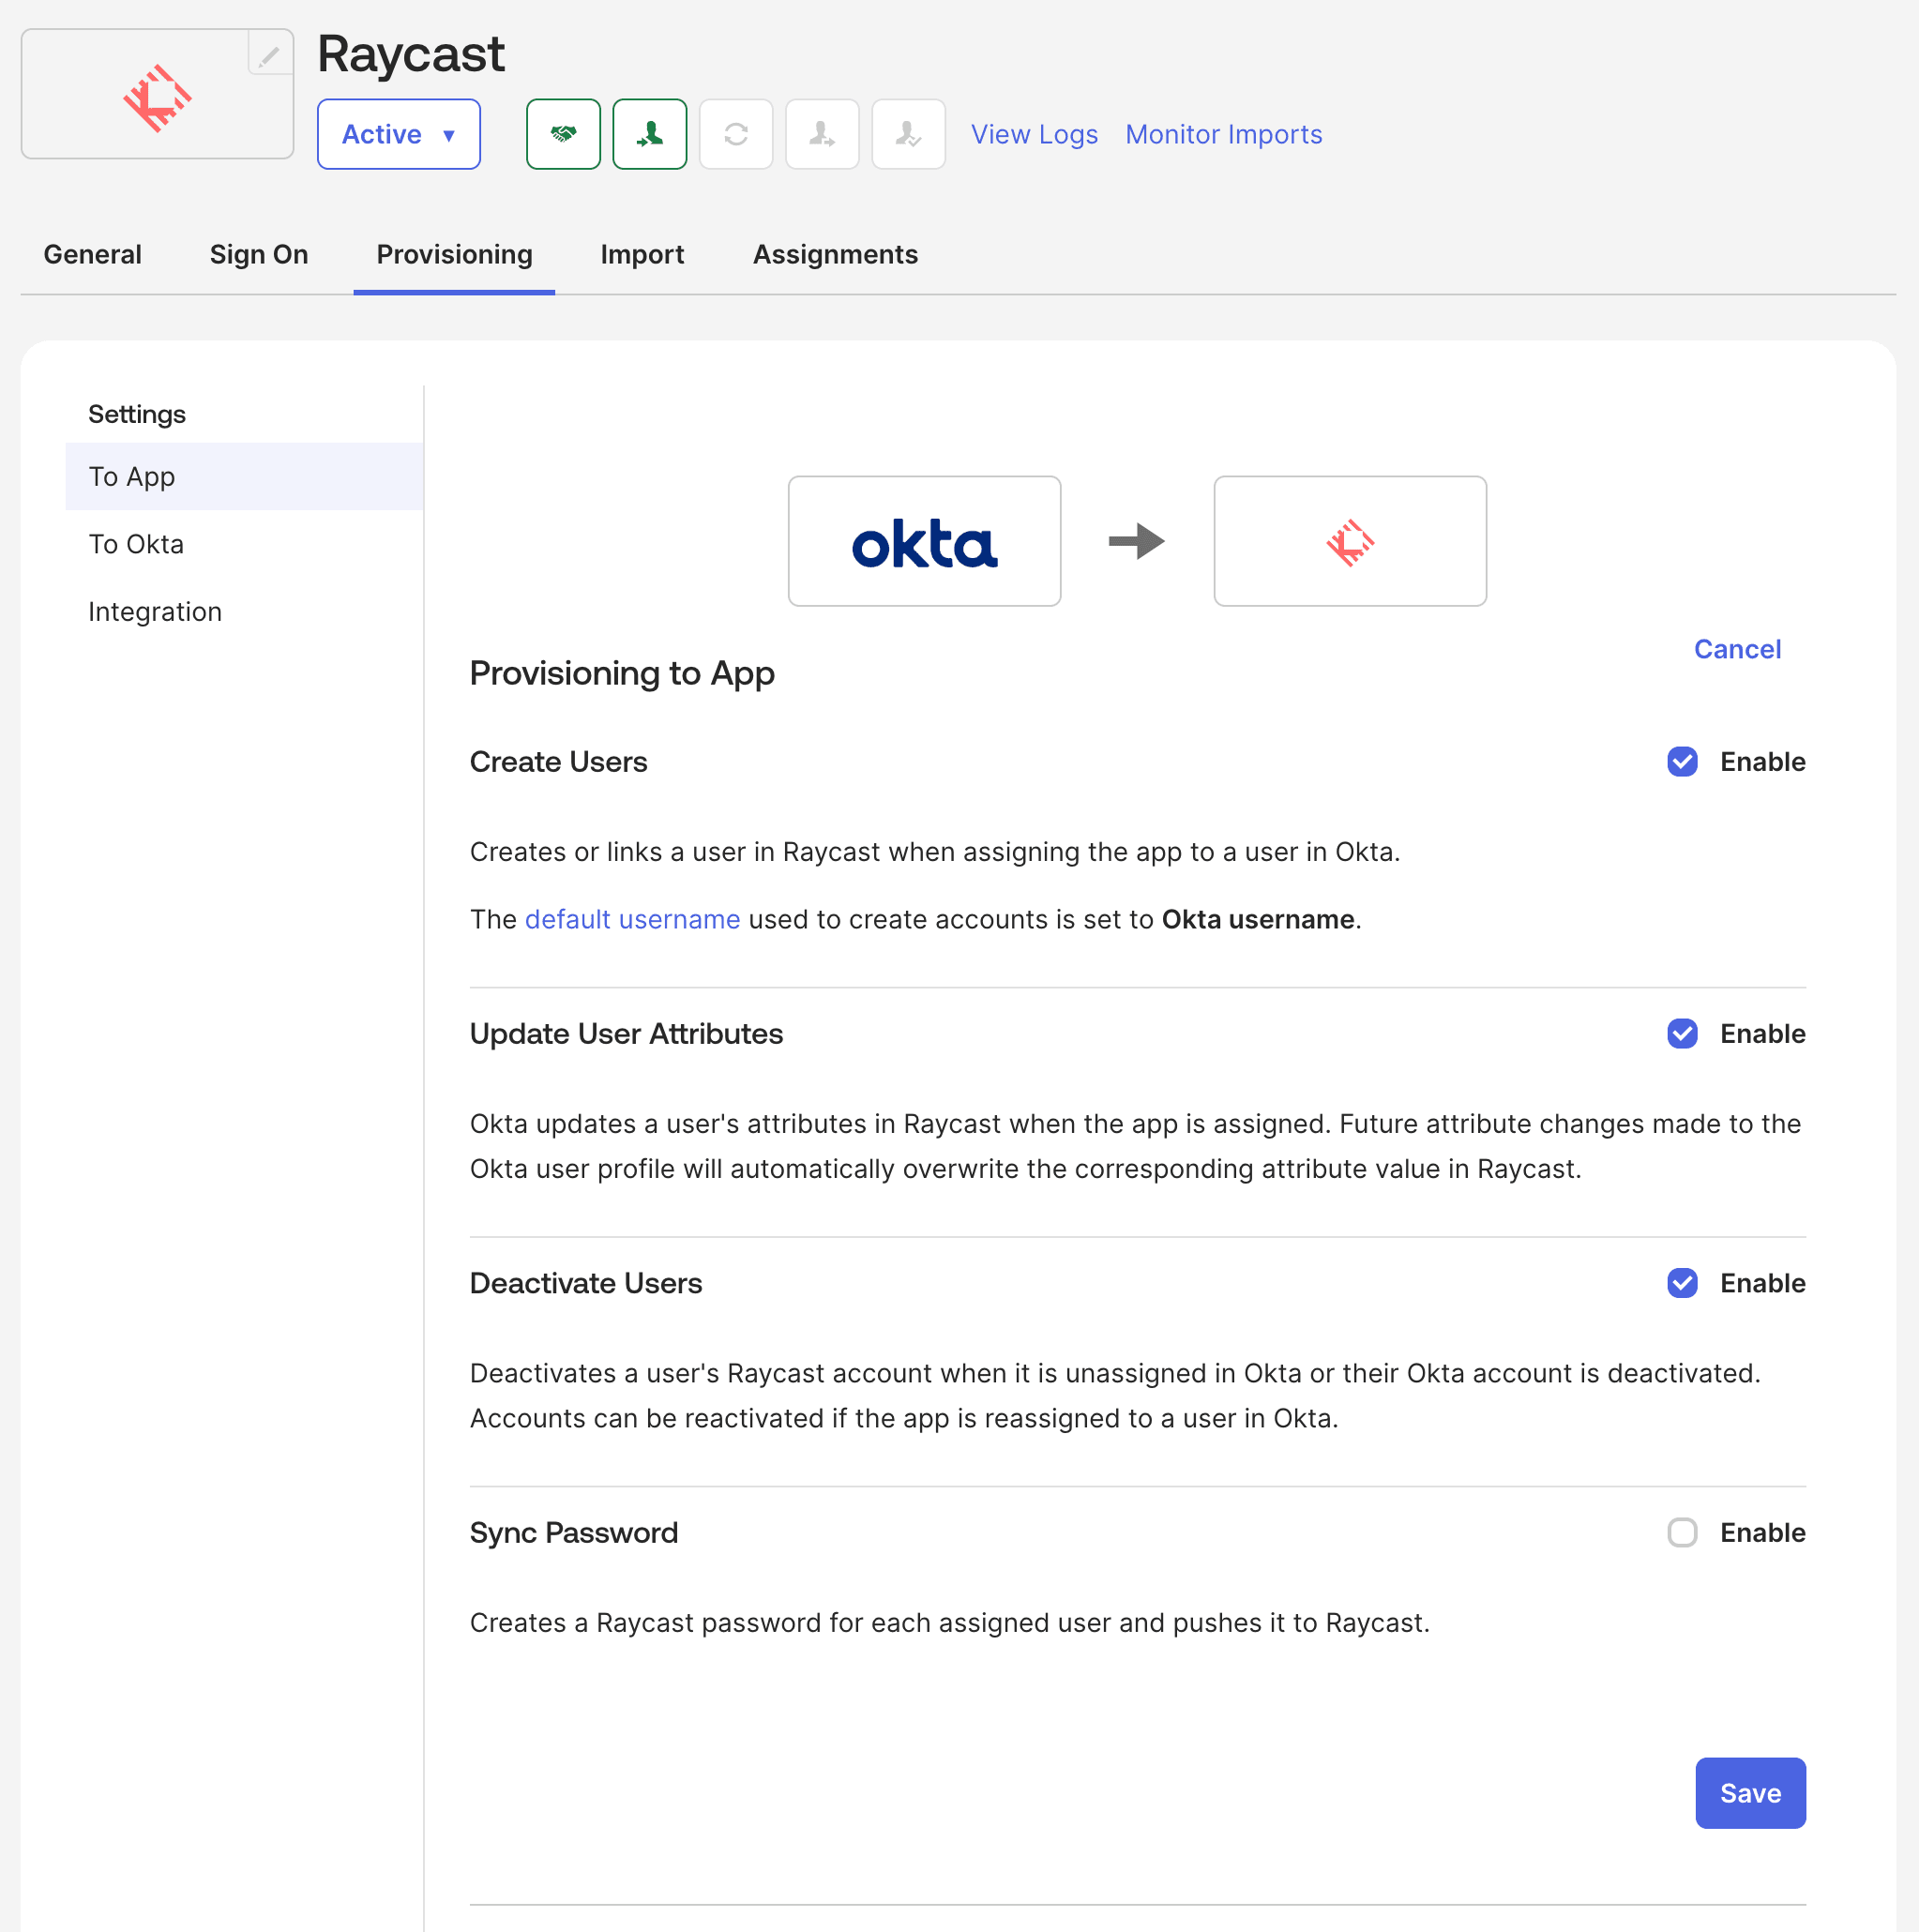
- Press Save
- Assign the Application to users to ensure their accounts are created in Raycast
Provision with Microsoft Entra ID
- In the Microsoft Entra admin center, navigate to Entra ID → Enterprise apps and select the Raycast enterprise application
- Open the Provisioning tab and press New configuration
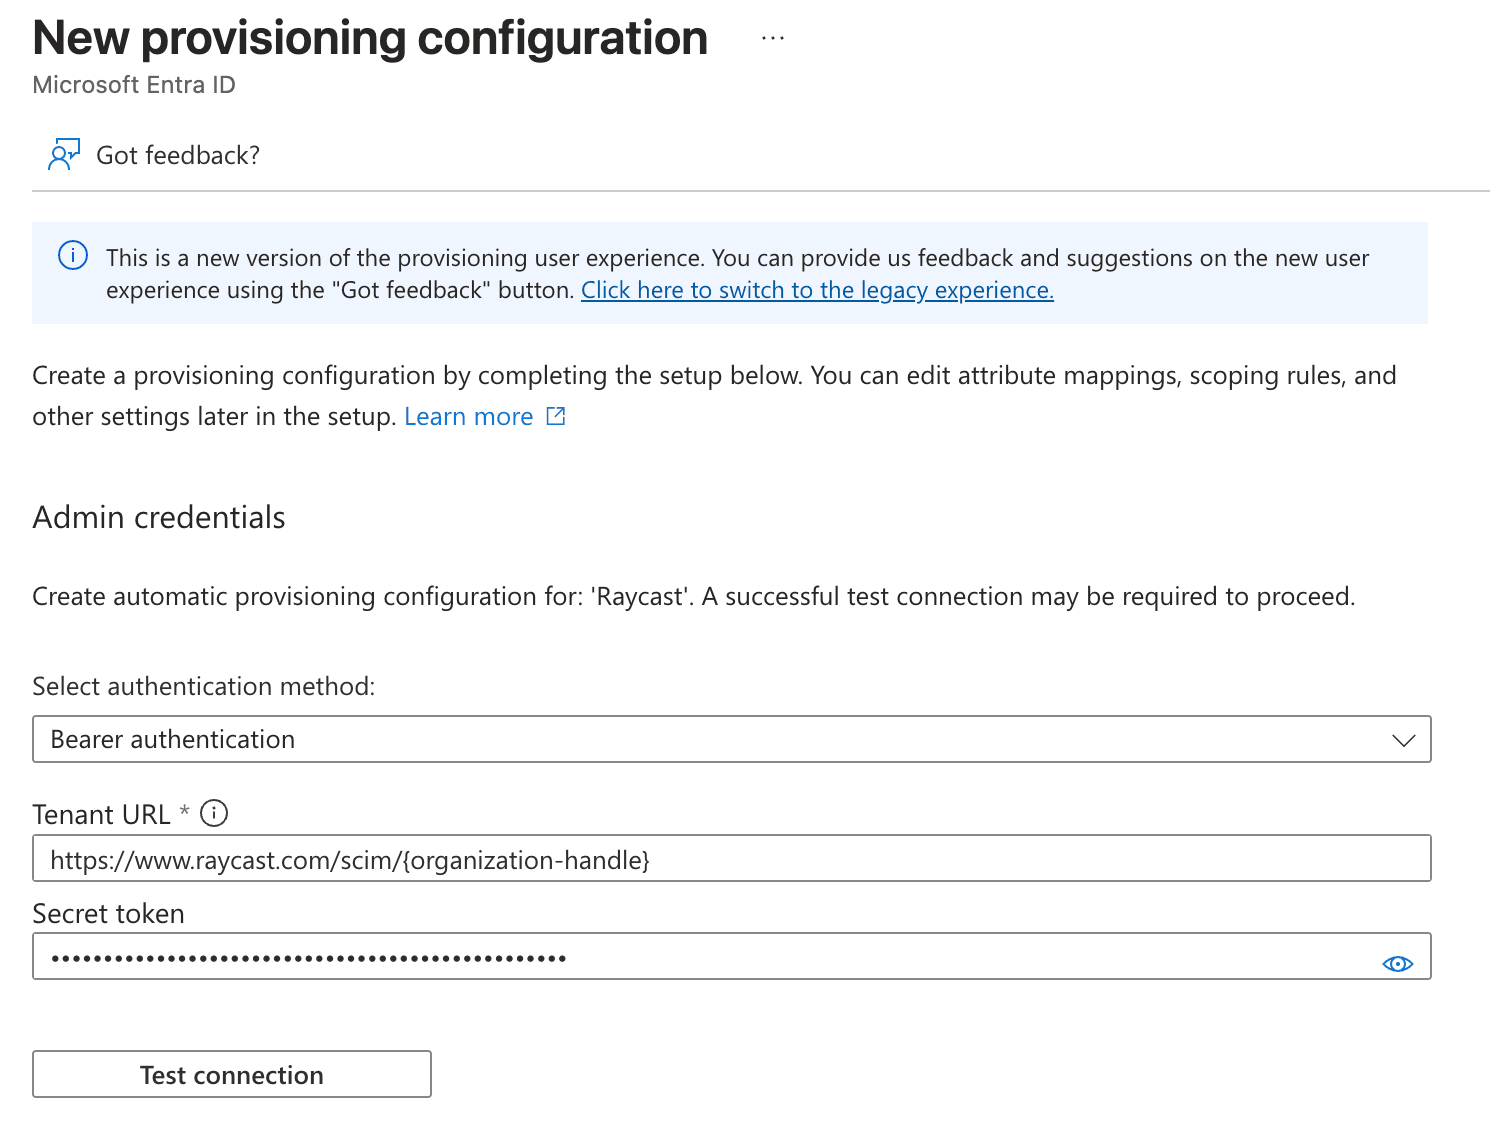
- Fill out the Admin credentials
- Select authentication method:
Bearer authentication - Tenant URL:
https://www.raycast.com/scim/{organization-handle} - Secret token: Paste the SCIM Token that Raycast shared with you through 1Password
- Select authentication method:
- Press Test connection to confirm that Entra ID reaches the Raycast SCIM endpoint
- After the test passes, press Create
- Still in the Provisioning tab, expand the Mappings section
- Confirm that Provision Microsoft Entra ID Users is enabled
- Confirm that Provision Microsoft Entra ID Groups is disabled, because groups are not supported yet
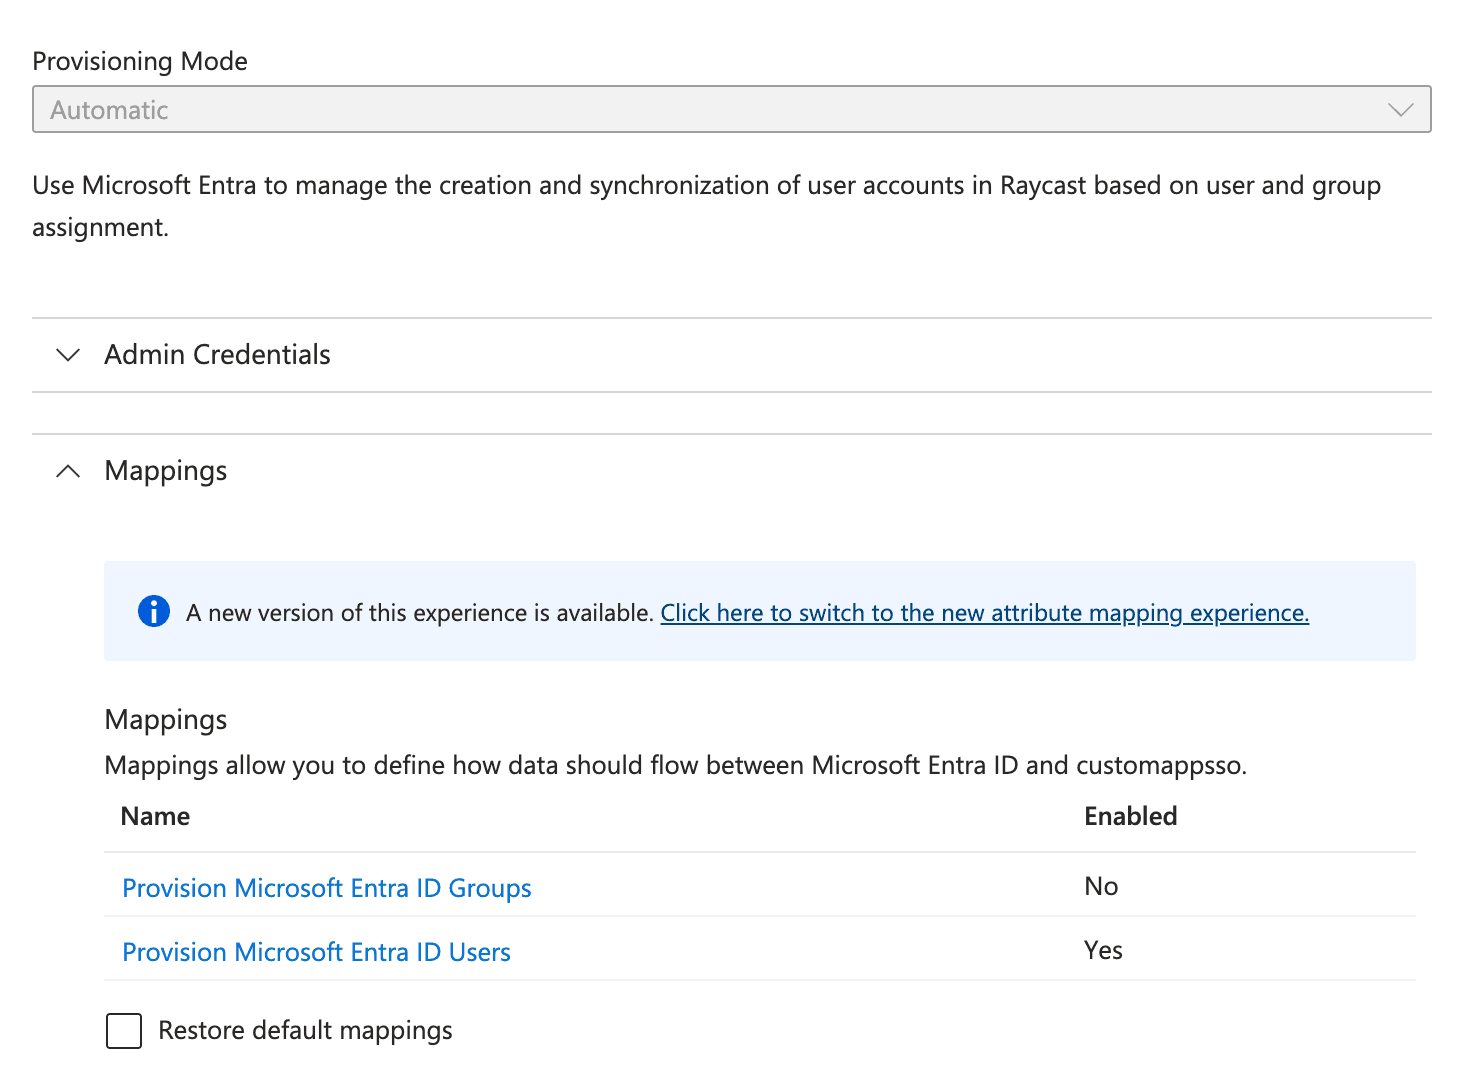
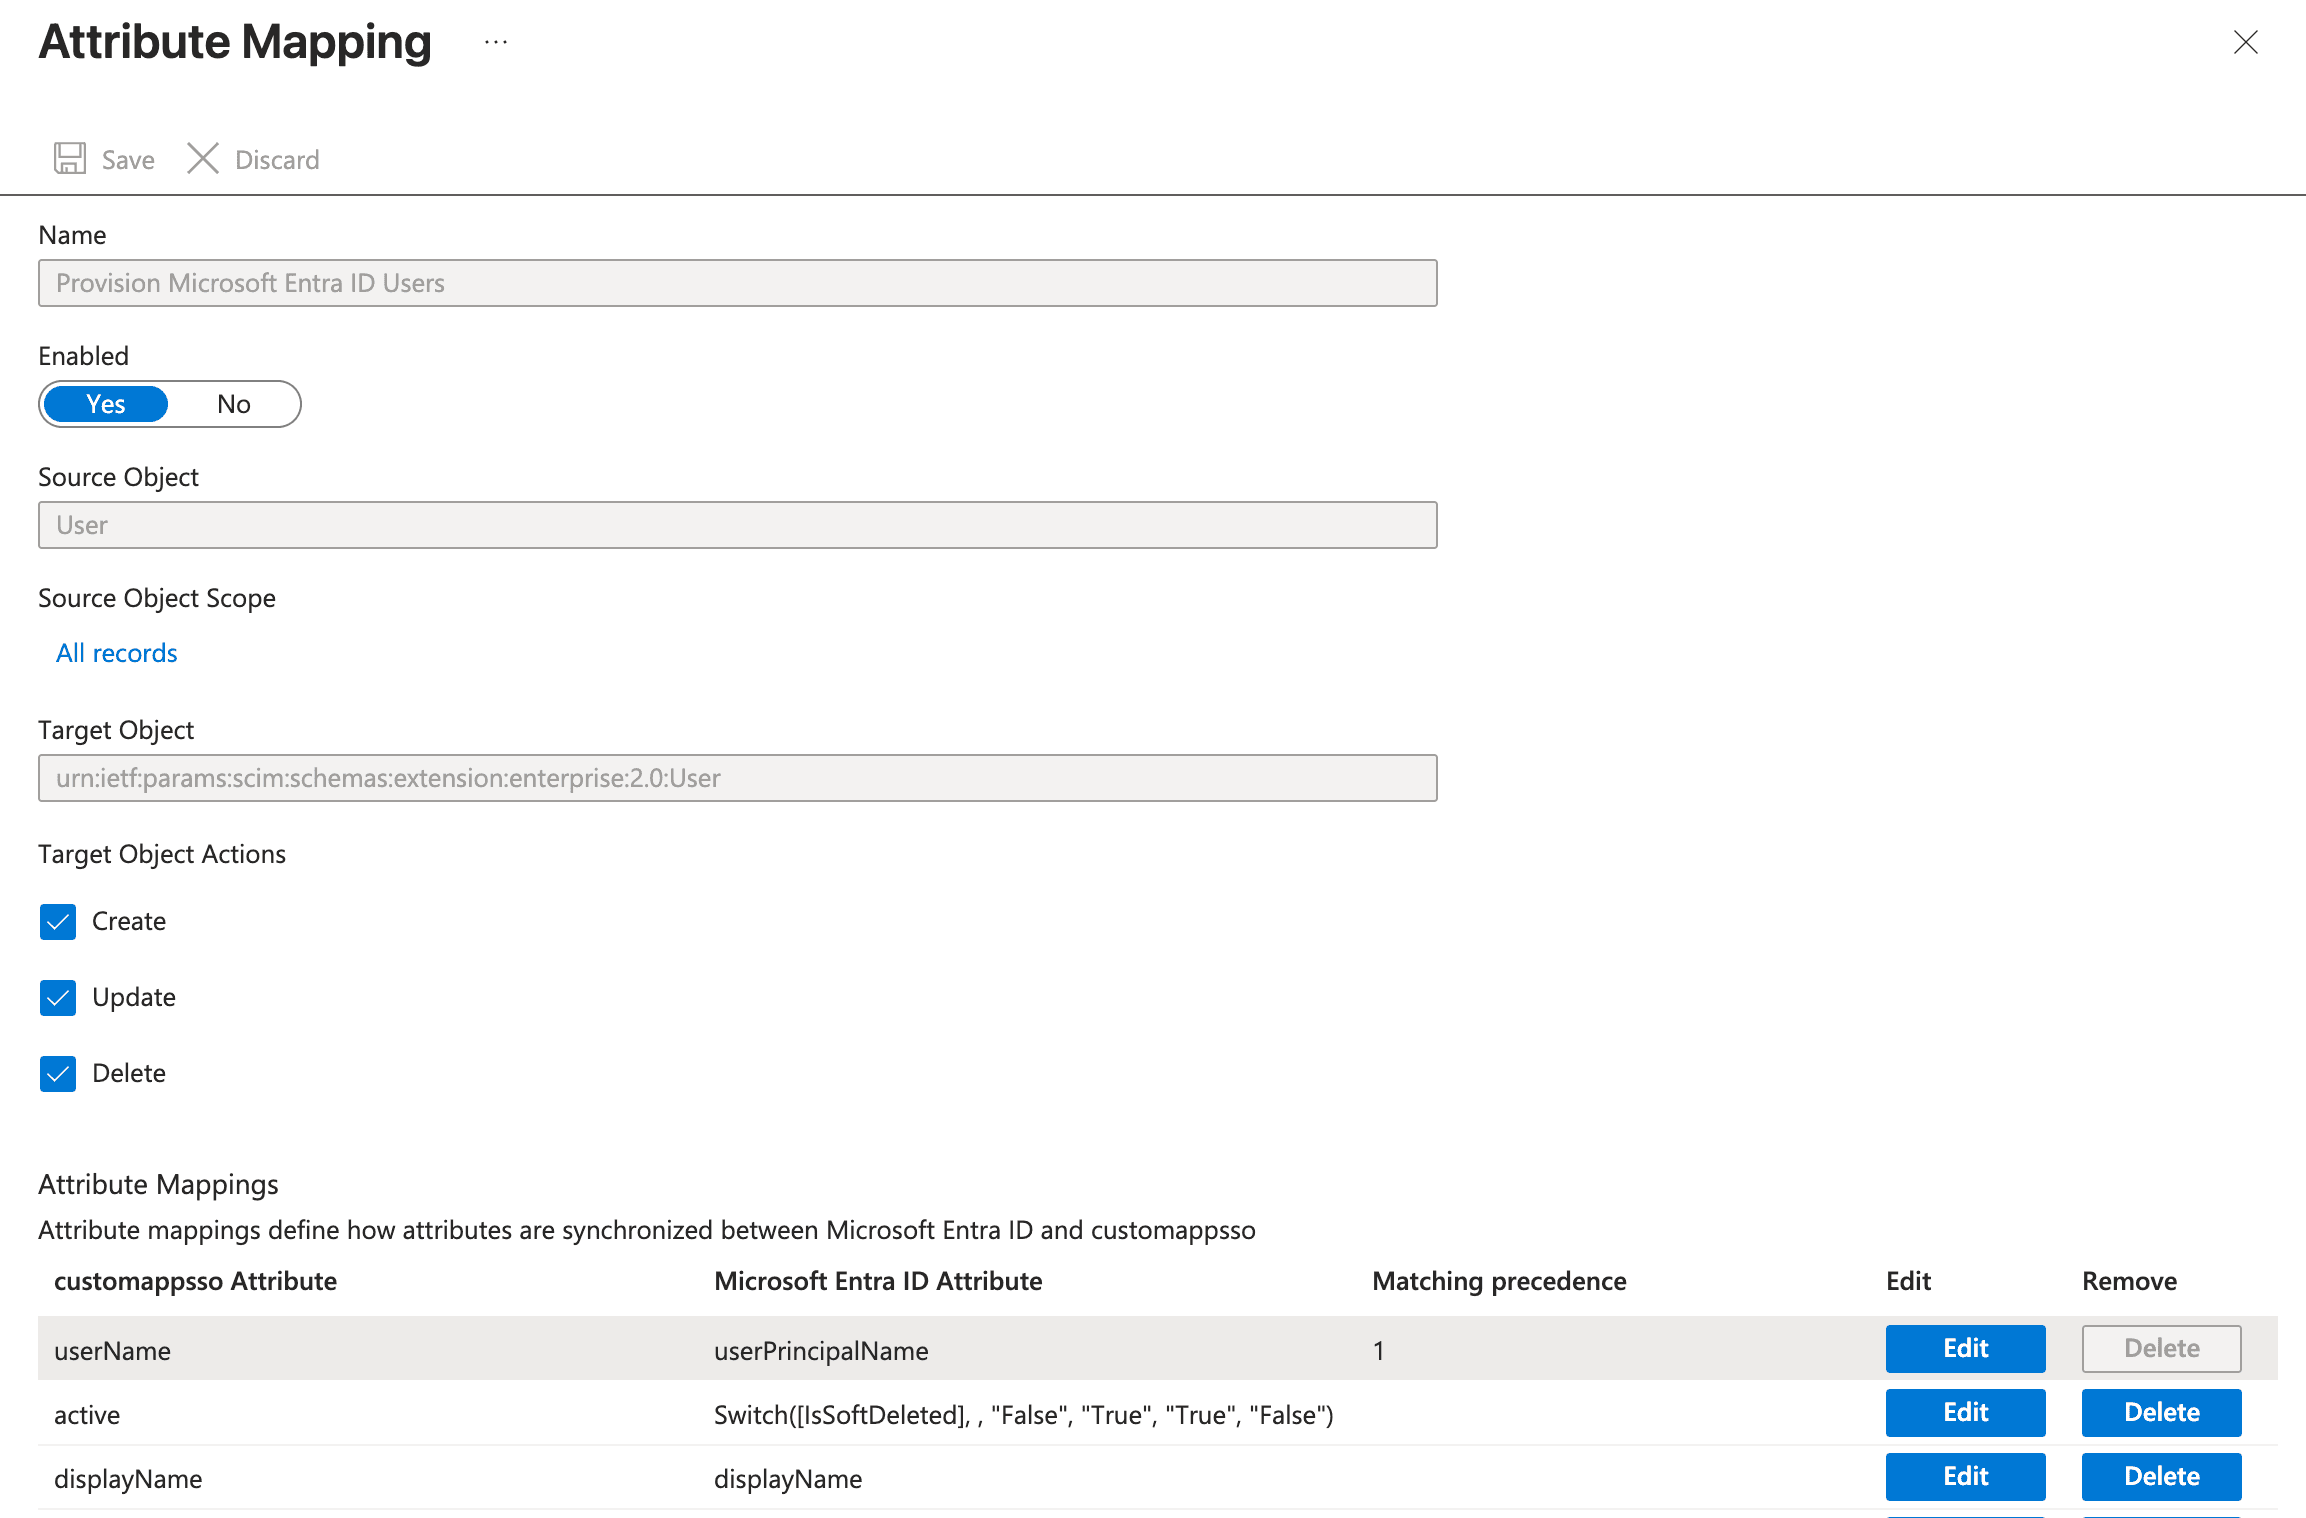
- Press Provision Microsoft Entra ID Users
- Check that
userNamemaps touserPrincipalNamewith Matching precedence1 - Confirm that Create, Update and Delete are checked under Target Object Actions
- Check that
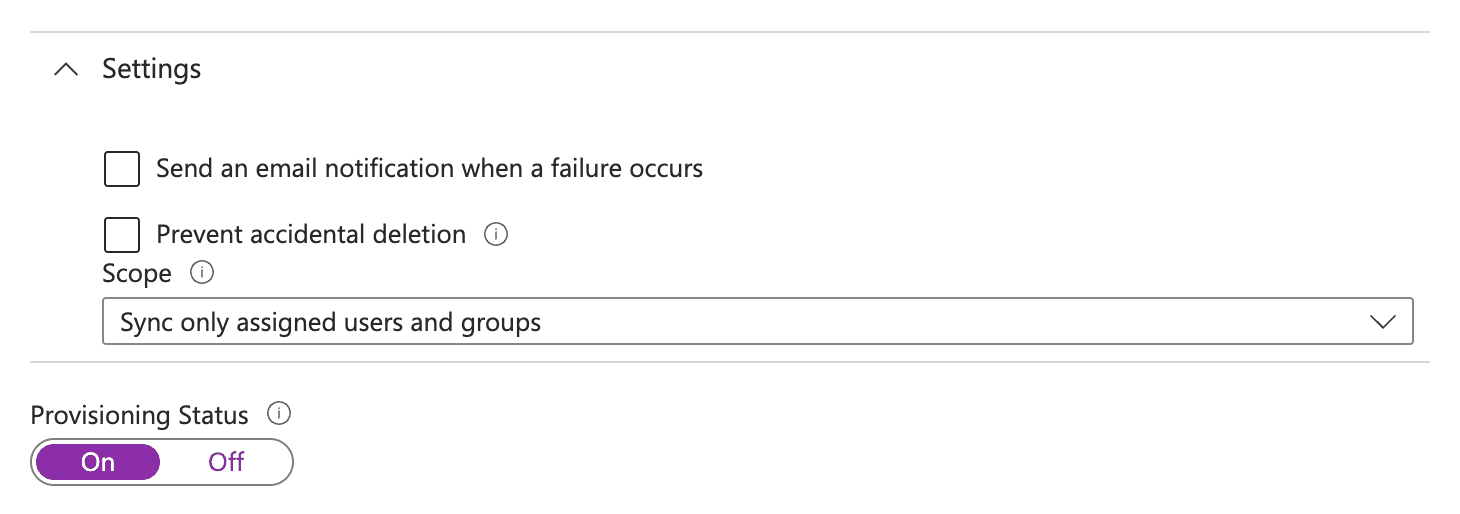
- Go back to the Provisioning tab and expand the Settings section
- Scope:
Sync only assigned users and groups - Send an email notification when a failure occurs: unchecked
- Prevent accidental deletion: unchecked
- Scope:
- Set Provisioning Status to On and press Save at the top
- Assign the Application to users in the Users and groups tab to ensure their accounts are created in Raycast